Hardlight


The material can be downloaded here:

Files in the zipp, a selection, a brushes and a gradient:


The tubes must be opened in Affinity Photo ... Save the selection
The gradient must be imported ... if you do not know how, then you can see it on pdf file in the material :
 

1. Create a new Image 950x575 Pixels


2. Shape: Rectangel Tool: Make a rectangel around your image


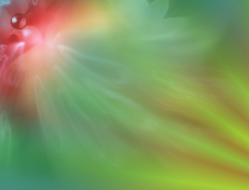
3. Go to Styles ... Category: Hardlight ... press on hardlight1


4. In the Layer panel ... Right-click... Duplicate


5. In the Layer panel: stand on the lower gradient layer


6. Go up in Filters ... Blur... Gausian blur ... Radius 40


7. In the Layer panel ... press the top layer


8. Go to Styles ... Category: Hardlight ... press hardlight2


9. In the Layer panel: right-click ... Rasterise


10. Go up in Select ... Load selection from file ... brows to your selection, as you saved ... press  and open


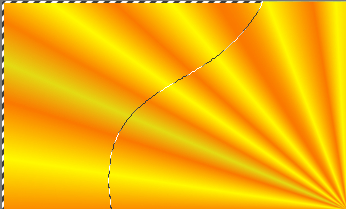
11. Press Delete on the Keyboard


12. Go to the Layer panel ... set layer opacity about 60% ... Set Layer Blend Mode: Hardlight


13. Go up in Select ... Deselect


14. Open the tube animabellefr ... right click on the tube ... press Copy


15. Go to your work picture ... Right-click the picture ... Paste
Move Tool: Move the flower up into the upper left corner
 
16. In the Layer panel ... Right-click... Duplicate
 
17. In the Layer panel ... right-click ... Merge Down
 
18. Brushes panel: ... Category Hardlight ... press the brush
 
19. Erase Brush: set options like here
 
Wipe out some of the whites so it be nicer
 
 
20. In the Layer panel: set layer Opacity 85
 

21. In the Layer panel : right-click ... Merge visible


22. Open the tube: lady 675 ... right-click the tube ... press Copy

 
23. Go to your work picture ... Right-click the picture ... Paste

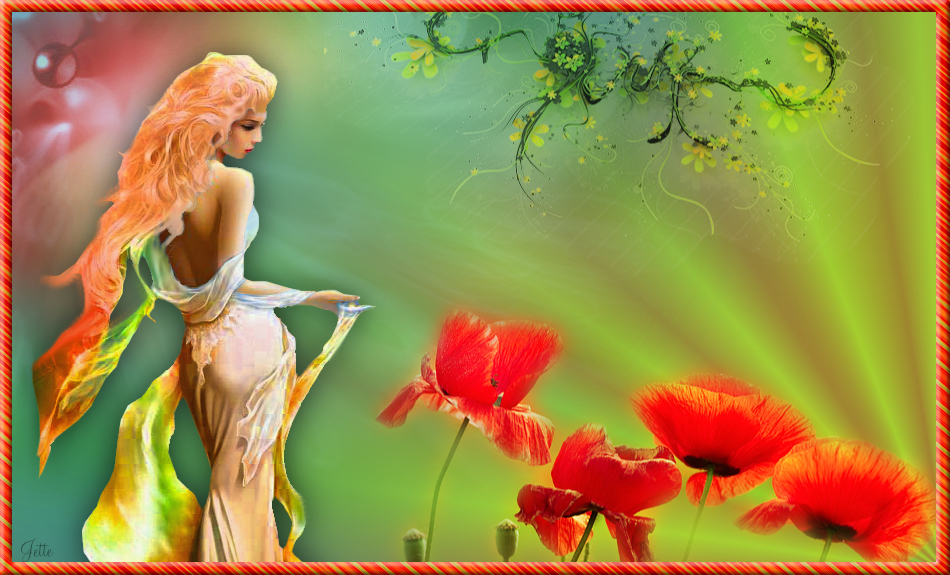
Move the lady into place on the left side


24. In the layer panel ... right-click... Rasterise


25. At the bottom of the Layer panel press Adjust ... in what comes out, select Vibrance
Settings: Vibrance 100% ... Saturation 0


26. Go to the layer panel set layer Opacity about 90%


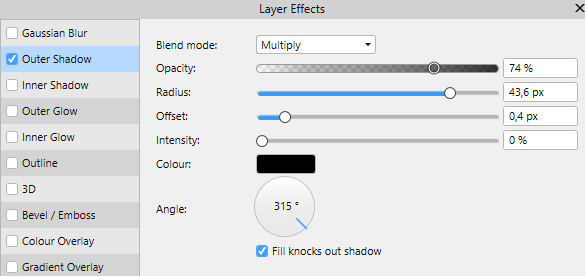
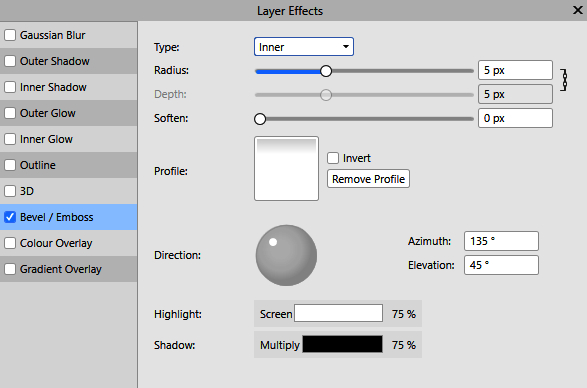
27. In the Layer panel: press the bottom of the Layer Panel --- check in Outher Shadow ... set of settings as below:

Remember to check in scale with object


28. Open the tube Flower1816 ... right click on the tube ... press Copy

 
29. Go to your work picture ... Right-click the picture ... Paste

Move ut the flowers on top ... look at my finish picture

 
30. Go to the Layer panel ... set layer Blend to Hardlight ... set layer opacity 80%
 
31. Open the tube natur97-misted_by_dragonblu220507 ... right-click the tube ... Copy
 
32. Go to your work picture ... Right-click the picture ... Paste


33. Go to the Layer palette ... blend blend mode for Hardlight
 
34. Move the tubes into the place as in my picture, or as you thought
 
35. Go to the Layer panel ... right-click the top layer ... Merge Visible
 
36. Rectangel Tool: Make a rectangel about your image
 
37. Go to Styles ... Category: Hardlight ... press the gradient frame
 
38. I Layerpanelet ... højreklik ... Duplicate
 
39. In the color panel set the colors like that, you can choose any color, it should not be used.


40. If transform is not in the panels so go up in View ... Studio... press Transform

 
Now it should look like this:
 
 
41. In the Layer panel ... Select  top two  layers
 
42. On top of Geometry ... press Substract
 
 
43. Press the bottom of the Layer panel --- check in Bevel/Emboss ... settings as below:

Remember check in scale with object

 
44. Write your name on the picture and save


Back


Rehders-design

©