

You can download the material here:

1. Create a new Document (image) 950 x 600
2. Create a new layer
3. Flood Fill Tool: fill with color (color does not matter here)
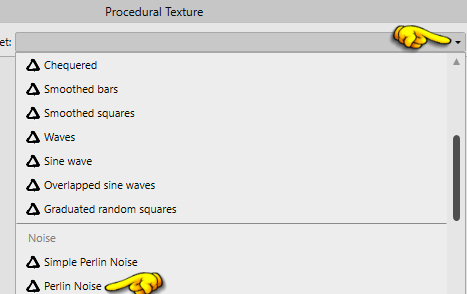
5. In what comes out: press the little triangle ... find Perlin Noise and press
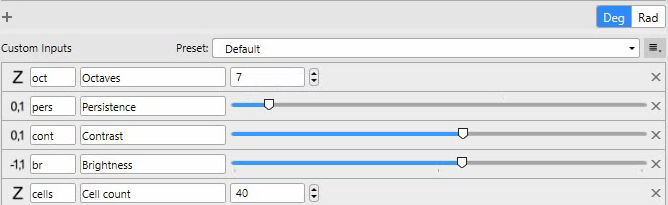
6. In what appears: set settings as below and press Apply
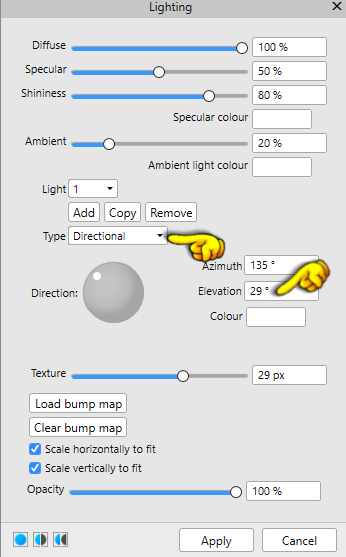
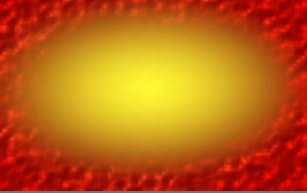
7. Go up in Filters ... Lighting ... Set Type to Directional, and texture to 29. Press Apply
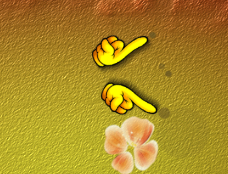
see the yellow fingers below:
8. Shape ... Rectangle Tool: Drag a rectangle around the image
Now the layer panel looks like here below:
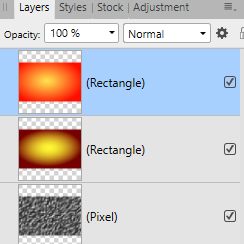
12. Press the two Rectangel layers ... right-click ... Rasterise
13. Press the bottom layer and pull the layer up over the other two layers
press on the layer ... right click ... Rasterise to Mask

16. Layer panel: right click ... Merge Down
17. Go up in Filters ... Lighting ... set settings as below and press Apply:
18. Set Type to Directional, and Texture to 29. Press Apply
19. Open the Flower from the material ... Go up in Edit ... Copy
20. Go over to your work image again ... Go up in Edit ... Paste
21. Inpainting Tool, it is located just below the smudge in tools. Set settings as below:

23. Move Tool: pull the flower up as in my finished picture
24. Eraser Tool settings as before. Erase away some of what goes outside the yellow
25. In the Layer panel ... set the layer blend to Multiply
27. While you are there: right click ... Merge down
28. Move Tool: move the flower into place
31. Copy / Paste to your image in the same way as before
32. Move Tool: make the tube smaller by grabbing a corner and pushing in towards the center
33. In Layer panel: set the layer Opacity 75
37. Open the last tube ... Copy Paste in the same way as before
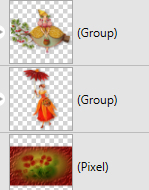
My layers looks like this:
44. Layer panel: press eg at the bottom of the layer panel. set settings as here:

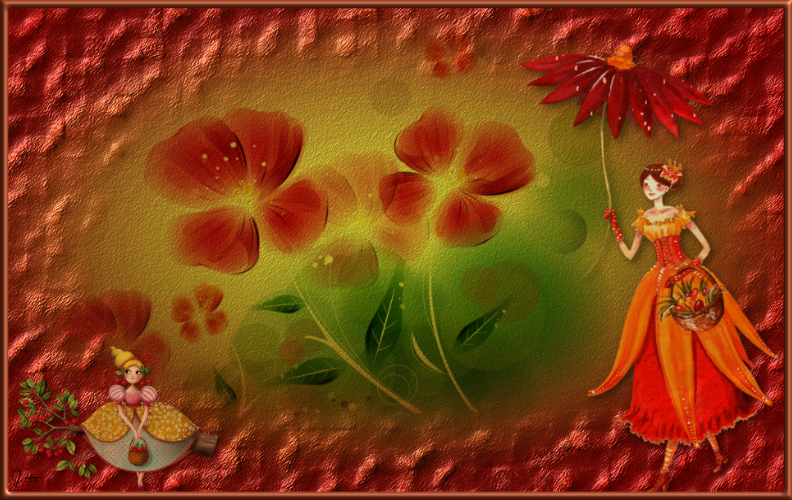
45 .. Put your name on the picture
46. Stand on top layer ... Merge Visible