
Get the material here

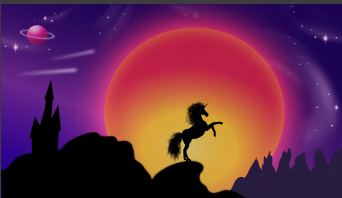
Unicorn
1. Create a new document ( picture ) 850 X 500 px
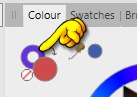
2. In the color panel: close the underfirst color, by pressing the circle, see yellow finger on the left here below.
Then press in the small circle so that the color is closed. See picture here under right:

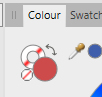
3. Press the other large ball once to activate the
The circle located on top of the other is always the active one. It now looks like this.
4.  Shapes recktangel Tool : Make a rectangle around the image
Shapes recktangel Tool : Make a rectangle around the image5.  ( Gradient ) Fill Tool:
( Gradient ) Fill Tool: 6. Press in the top of your image and drag down to the bottom, so you have a ball at the top, and one at the bottom as below:
7. Press the line where the blue finger here below points. You've now made an extra ball.
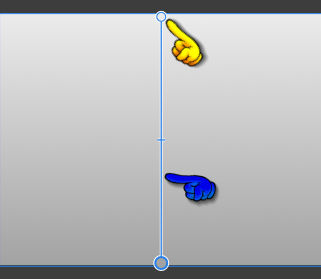
8. Press in the top ball ( see yellow finger above )
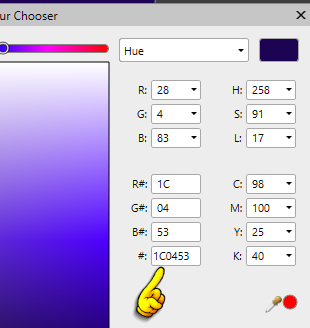
9. In the Colour Panel: Double-click on the color ball
10. This box appears ... color code : 1C0453 in the palette. See yellow finger here below:
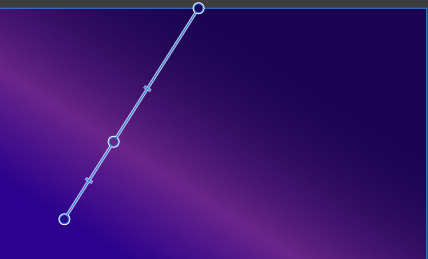
11. Press in the middle ball ... set the color code to : 6A258A
12. Press in the bottom ball ... double click on the color ball ... type color code : 2B018D
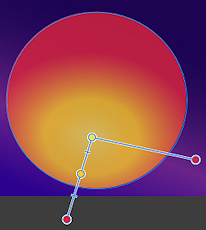
13. Turn the gradient rline as below by grasping a ball at the top or at the bottom and dragging it to the side
Now my looks like this:
14. Open the file: Stars... right click on the stars... Copy
15. Go over to your work picture again and press it to activate it... Right-click... Paste
Now it looks like this:

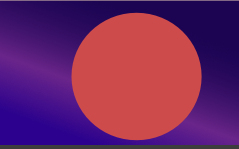
16. Shapes Ellipse Tool: Make an ellipse to the sun. The color doesn't matter
17. Gradient Fill Tool :press on the color box at the top of the Context line:
:press on the color box at the top of the Context line:
18. Select Gradient. Press and insert the color codes as you see here during the
To make your own bullet, press the line. Set the Elliptcal gradient. See yellow finger:
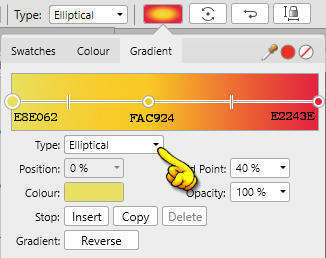
19. Set the layer opacity 85
Now the sun should look like this:
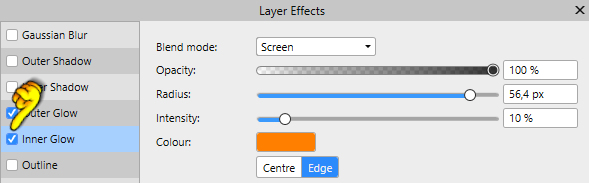
20. Press on fx in the
bottom of the layer panel
In what comes out: tick the Outer Glow ... settings as here. the color for red
Remember to check in scale with object : 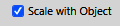
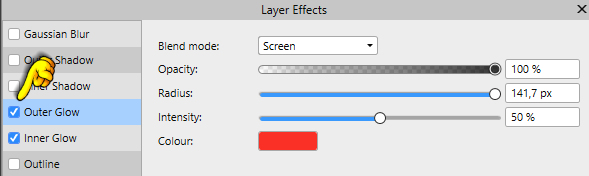
21. Press Inner Glow ... Set options and set the color to orange
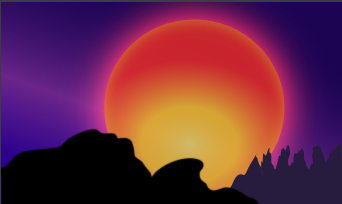
Now it should look like this:

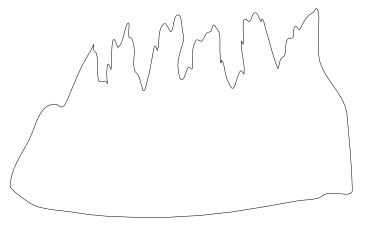
22.  Pencil Tool :
Pencil Tool :Set the colour like this

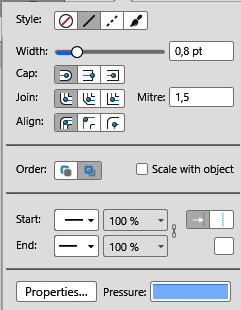
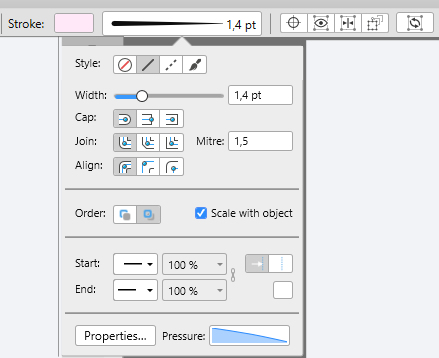
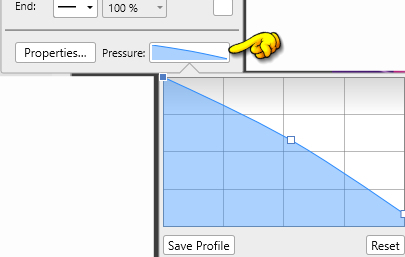
23. Press Node tool  : in stroke at the top ...press the line see red dot ... Black Color in Stroke
: in stroke at the top ...press the line see red dot ... Black Color in Stroke
This is coming out: Set width to 0.8
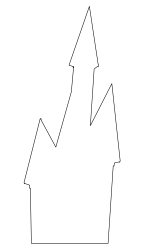
24. Draw trees that you like. Mine looks like this:
25. While standing on the layer ... In the color panel ... Switch by pressing the curved arrow
See yellow finger here below:

26. Double-click the color ... set this color code : 271C3D
27. Create a new Raster Layer
28. Switch the colour again so it looks like this: set color: 000000
set color: 00000029. . Pencil Tool: draw a mountain like here below:

30. While standing on the layer ... In the color panel ... Switch by pressing the curved arrow
31. Now you have a black mountain ... put it in place at the bottom of the left corner or as you like:
32. Set colors like here:
Draw a house or tree, or whatever you think should stand on the mountain
on the left side. I chosen a house.
33.
Switch the color so the house turns black, and put it on the mountain
34. Pen Tool : set colors as below. color is : FFE9F8

35.In Stroke: set settings as below:
36. Press in the box, see yellow finger: Set as you see here under:
37. Draw a line to a comet
38. Press fx in the botton of the Layer panel
39.In what appears: put the notch in gausian blur ... settings as here. Remember to tick at the
bottom of Scale with object

40. In Layer Panel: set the layer Blend: Colour Dodge
41. Set layer Opacity 85
42. In the Layer Panel Right click on the layer ... Duplicate ... move the comets into place as you like
43. Open the file Space_JR ... right click on it ... Copy
44. Go over to your work picture again and press it to activate it... Right-click... Paste
45. Open the file: Unicorn put it in your picture in the same way as before
46. Resize with Move Tool by pushing the squares in the corners towards the center
47. Put everything in place like here:
48. Pencil Tool ... Set colors: ... draw the light at the top of the trees like here:
... draw the light at the top of the trees like here:
49. In the layer Panel: press on the layer with the sun
50. On the top: Edit ... Copy
51. Touch the layer you just drew
52. Go up in Edit... Paste Style. Now the gradient from the sun sitting on your light
53. Press on fx i in the bottom of the Layer Panel
In what appears: put the notch in gausian blur ... settings as here. Remember to tick at the
bottom of Scale with object

54. Draw light at the top of the mountain ... Colour: D93E36
Use Gausian Blur as before, or as you like
Remember to tick at the bottom of Scale with object in Gausian Blur
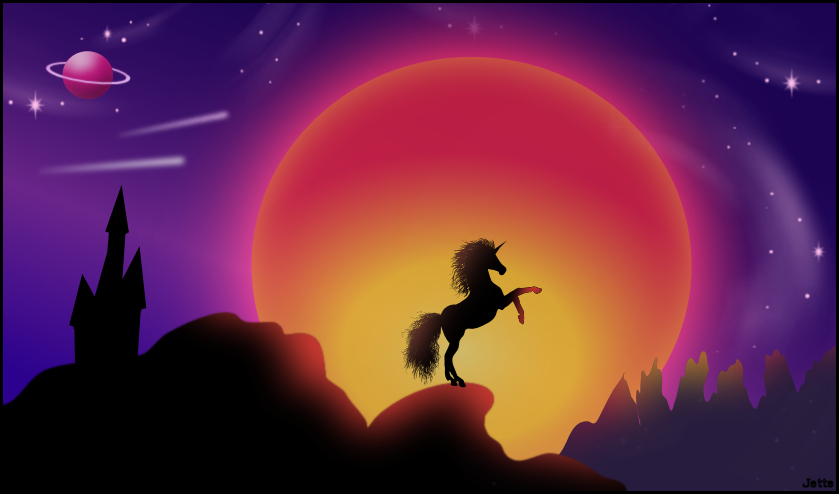
55. Set the name of your picture and save it
Rehders-Design
©