


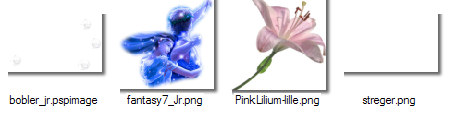
The material can be downloaded here:

The tubes open in Affinity Photo when you need them
If you do not seeTransform then go into View ... Studio ... find Transform and check. Now you should be able to see it.
If you can't find it then look where the layer panel is or where the brushes panel is
Press V on your keystroke to activate the Move Tool. To use Transform in this way, it must be enabled
Before you begin, you must: Import Styles Category ... Magic. See the link below to see how to do it:
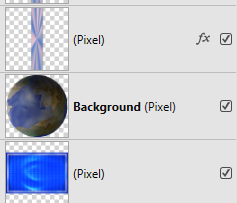
2. Create a new layer
2. Create a new layer
Shapes Rectangle: Make a rectangle about the image
6. Transform: tap the upper left square, just put the numbers in the right side, the others change automatically..
7. In the Layer panel: right-click ... Duplicate
9. Transform: set setting as below:
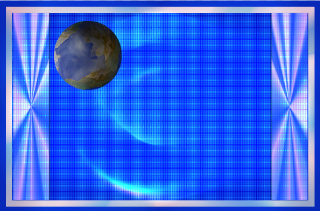
Now it should look like this:
11. Go to your work image again ... right click on the image ... Paste
Transform: set setting as below:
12. In the Layer Panel: Blend ... Color Dodge
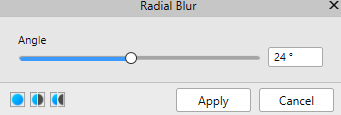
13. Go up to Filters ... Blur ... Radial Blur ... set the settings below and press Apply:
Now my looks like this:

14. Layer panel: right-click ... Merge Visible
15. Select all the underlying layers and press Delete on your keystroke

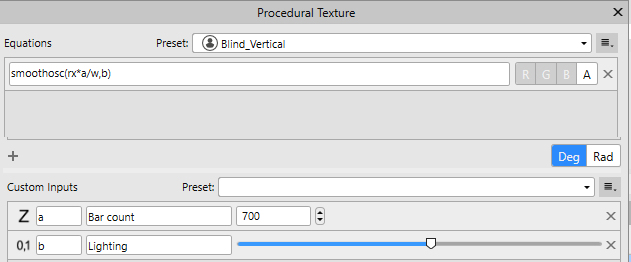
19. Make settings in Custum Inputs as below and press Apply:
You now have a layer of stripes
20. In the Layer panel ... set the layer Blend: Overlay
21. In the Layer panel: right-click ... Duplicate
24. Shapes Rectangle Tool: Make a rectangle on the left side of the frame as below:
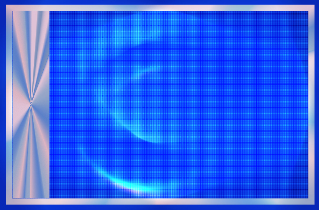
25. Layer panel ... set Blend to: Glow
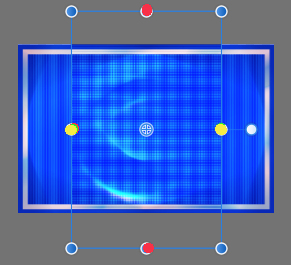
28. Move Tool: move the table to the right side within the frame
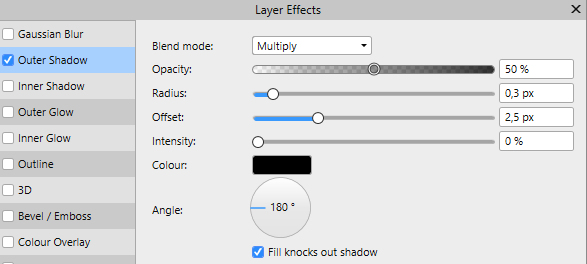
29. In theLayer panel at the bottom ... press fx and this below the text will appear:
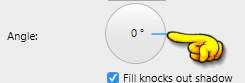
Make settings as below. remember to set Angle to 180, and notch in Scale with Object
Let it get ahead. If it gets in the way of your image, you can move it in the bar that says Layer Effects.
33. Go to your work image again ... right click on the image ... Paste
35. In the Layer panel ... drag the layer down so it is as below:
36. In the Layer panel: right-click ... Duplicate
38. Go to your work image again ... right click on the image ... Paste.
Move the bubbles into place within the frame
40. Go to your work image again ... right click on the image ... Paste.
Move the bubbles into place within the frame