

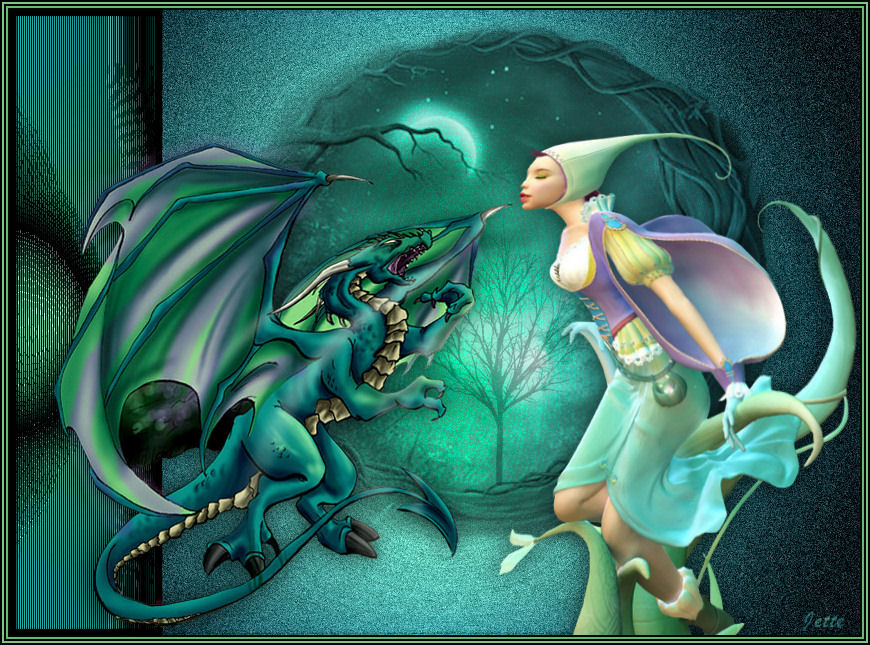
Dragon Trip
Are you using an older PSP then you should download this tutorial here the link to the files located in the tutorial
These files below are in the material + a gradient and a selection:

Open the tubes in Paint Shop Pro
The gradient should be in the folder: Documents \ Corel Paint Shop Pro \ 17.0 \ Gradients
The selection should be in the folder: Documents \ Corel Paint Shop Pro \ 17.0 \ Selections
1. Create a new image 850x625 pixels
2. Go to Gradients ... find gradient: Jette-Ocean ... settings like here:
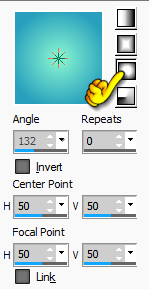
3. Tag Flood Fill ... fyld dit billede med gradienten 3. Remove the Flood Fill ... fill your image with the gradient
4. Gå op i Adjust ... One Step Photo Fix 4. Go up to Adjust ... One Step Photo Fix
5. Go up to Adjust ... Brightness and Contrast ... Local Tone Mapping ... settings like here: and press ok
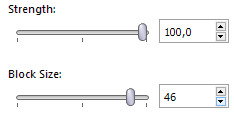
6. Gå op i Effects ... Geometric ... Cylinder Horizontal ... sæt Strenght til 100 6. Go up to Effects ... Geometric ... Cylinder Horizontal ... set Strength to 100
7. Gå op i Effects ... Photo Effects ... Vignette ... sæt indstillinger som her under, og tryk ok 7. Go up to Effects ... Photo Effects ... Vignette ... settings like here: and press ok
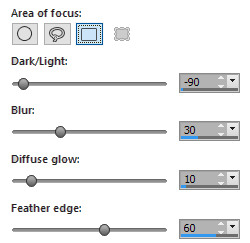
8. Go up o Adjust ... Add / Remove Noise ... Add Noise ... settings like here: and press ok

9. Gå til Layerpaletten ... opret et nyt lag 9. Go to Layer Palette ... create a new layer
10. Go up to Selections ... Load / Save Selection ... Load Selections from disk
Find selection: sel drageb ... settings like here ... and press Load.
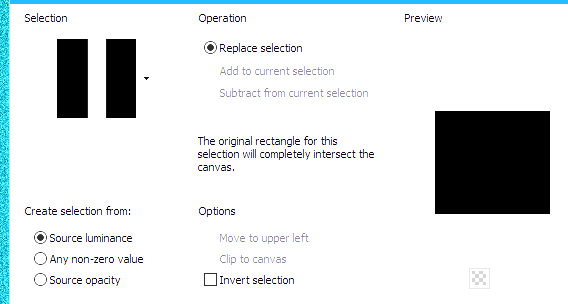
Let selection stand to I write other .
11. Take the Flood Fill Tool and fill the selection with the gradient from point 2
12. Go up to Effects ... Photo Effects ... Vignette ... Settings are from before ... press ok
13. Go up to Adjust ... Hue and Saturation ... Hue / Saturation / Lightness
Touch the little black notch at the top ... set it to default

Set the other settings settings like here, and press ok:
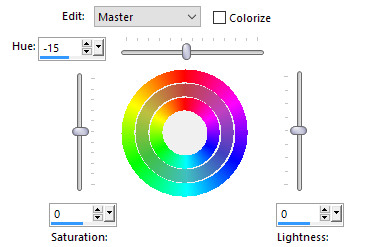
14. Go up to Effects ... Texture Effects ... policed stone ... settings like here, and press ok color: # 28aa80

15. Go up to Effects ... Texture Effects ... Blind ... settings like here: and press ok

16. Go up in Selections ... modify contract ... set the to 6
17. Go up in Selections ... invert
18. Go to the layer palette ... close the lock by pressing the
19. Take the Flood Fill Tool ... set of options as below and press ok

20. Fill the black color in the foreground color ... press the border just outside selectionen

Now you should have a black border
21. Go up to Selections ... Select None
22. Open the tube: 54368777.png ... Right click in the bar at the top of the tube ... press Copy in what appears
23. Go over your working image ... Right in the bar at the top ... press Paste as new layer
24. Go up in Image ... resize to 1050 x 772 pixels ... no check in resize all layers
25. Gå op i Image ... Mirror ... Mirror Horizontal 25. Go up in Image ... Mirror ... Mirror Horizontal
26. Go to the Layer palette set the Blend Mode to Luminance ... jerk tube in place as you see below:
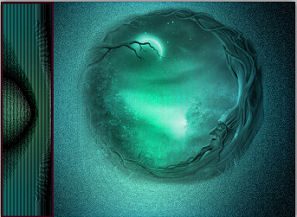
27. Go to the layer palette ... right click ... Merge Visible
28. Put the small wood on the image in the same way as in section 22 and 23.
29. Go to Layer Palette ... set the layer opacity about 30
30. Place the tube with the dragon in the same way as before.
31. Set this color in the foreground color: # e392fe
32. Take the Change to Target Brush Tool and set settings like here (please Check in Continuous)

33. Colour stripes in the wings of the dragon. It does not matter that you color outside, the colors only where the kite is.
34. Go up to Effects ... Distortion Effects ... Twirl set Degrees to 17
35. Go up to Effects ... 3D Effects ... Drop Shadows ... set the color to black
Settings like here, and press ok ... Black color
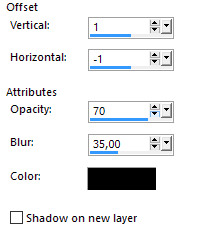
36. Set of elf, in the same way as before
37. Go up to Effects ... Distortion Effects ... Twirl set Degrees: minus 34
38. Give Drop Shadows ... Settings are from before, press ok.
39. Put your name on the picture
40. Add Borders ... Check in symmetric ... set of numbers 2 ... black color
41. Add Borders ... set of numbers 2 ... green color from the image
42. Add Borders ... set of numbers 2 ... black color
43. Add Borders ... set of numbers 2 ... green color from the image
44. Add Borders ... set of numbers 2 ... black color
Rehders-Design
©
