
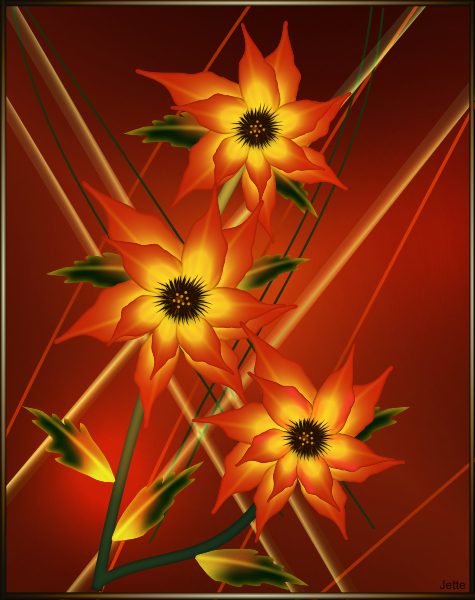
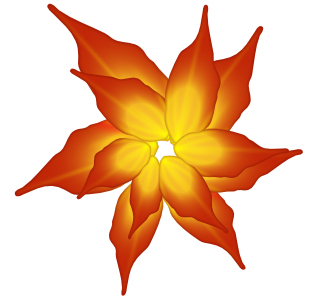
Orange flower
You can download the material here:

In the material is a Styles category
Import to Styles
1. Create a new document 825 x 1045 px
If you want to create the background you can find it on the link here:
1. Create a new document 825 x 1045 px
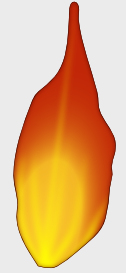
2. Shapes Tear Tool: 
In the Colour panel: set colors like this:  to close the lower color: double-click it tofarve: Dobbeltklik på den for at
to close the lower color: double-click it tofarve: Dobbeltklik på den for at få den frem og tryk i den lille cirkel
It is always the circle that is on top of the other that is activated. You activate them by double-clicking them
3. Make a Shapes : 
In the top: press 
4. Node Tool  : Press the square at the top of the Petal
: Press the square at the top of the Petal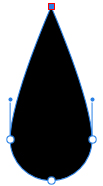
5. On top of convert: Press I... Middle icon. See red dot here:  '
'
'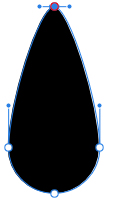
6. Node Tool: , and form the petal, by pushing and pulling the circles. You can give the petals more form
, and form the petal, by pushing and pulling the circles. You can give the petals more form
By pressing the line where there are no circles. Then there will be extra circles. Mine now looks like this:
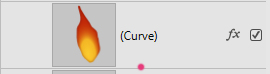
7. In the Gradient panel ... Category Gradientplay :... Select Styles 4
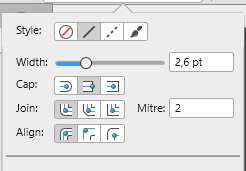
8. NodeTool : go up to Stroke ... Press the line and set width to 2.6
: go up to Stroke ... Press the line and set width to 2.6
8. Press the Blue Box
And this is coming forward:
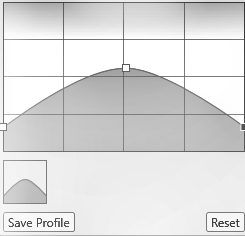
9. Grasp the squares at the top of the sides and push them almost to the bottom
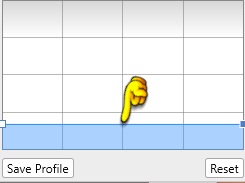
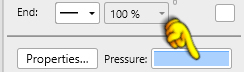
10. Double click on the line, see yellow finger on screen in the middle here above:
11. Drag the new square up as you see on my screen on the far right
12. Pencil tool: Draw a long line in the middle of the blade with black color
13. In the Stroke for the top: Change 2.6 to 4
14. Draw some small lines like this below:
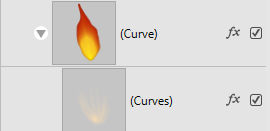
15. In the Layer panel... Select all lines layers, also the long line
16. Go up Layers... Expand Strokes
17. While they are still marked: go up the Geometry for the top... Press Add. See red Dot here below

18. StylesPanel... Select Styles 6. Now it looks like this:
19. In the Layer panel: Select the line layer and drag it down below the Petal layer. Drop where you see my red dot
Now it looks like this and there are no lines outside the petal
20. Press the small triangle on the layer with the petal
21. Press at the layer with the petal, then it is the two layers that are being worked on.
Hold DOWN CTRL and press J 5 times. Now you should have 6 petals. 22. Node Tool: Stand on the layers in shifts, and form the blades more if you wish.
Turn them, make some shorter or longer with the Move Tool. Mine looks like here under:
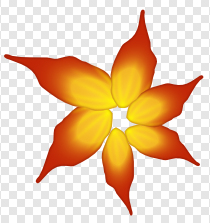
23. Layer panel: Mark all petal layers... Right-click Group
24. Layer Panel: Right click on Group layer... Right-click... Duplicate. Turn the flower a little like here under to the left
With Move Tool: Slide the corners so that the flower becomes smaller and put the stamens in the middle.
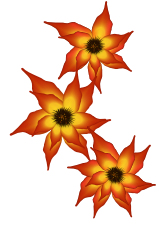
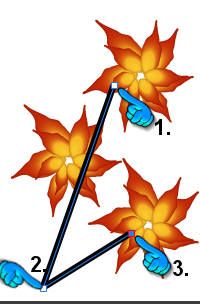
25. Put the flowers around like that, or as you thought
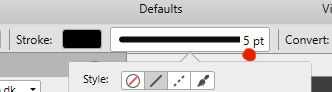
26. Pen Tool: Set the Stroke to 5 pt
27.To draw the stalk, do this: press where you see my finger 1, and where you see my finger 2, and finally finger 3
28. Double click on the last square you set by finger 3. To break the Curve
29. Node Tool : Grasp the stem in the middle and pull it to the side. See below to the left of the image:
: Grasp the stem in the middle and pull it to the side. See below to the left of the image:
30. Styles panel from the material: Select Style 7. Now my looks like here over on the right
31. Pull the layer with the stem under the layers with the flowers
Leaves
1. Create a new transparent Image 800x800 pixels
2. Node Tool : i n Stroke. Sæt som her: 
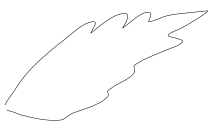
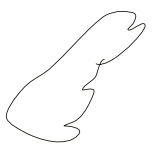
: i n Stroke. Sæt som her: 3. Pencil Tool  : Draw a leaf like mine or as you like
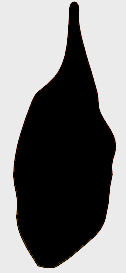
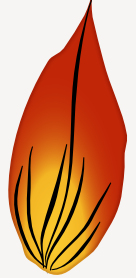
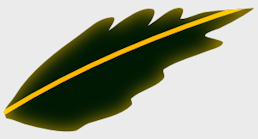
: Draw a leaf like mine or as you likeMy looks like this, just bigger:
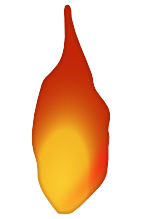
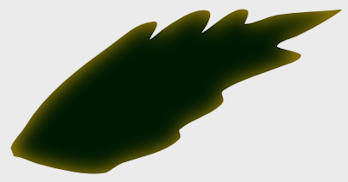
4. Styles panel from the material ... Select Style 1
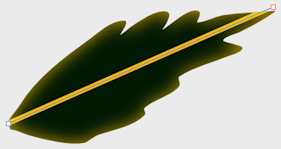
5. Pen Tool: make a line through the blade, you do it like this: Press where the line should start, and press again where it should end
You adjust the size of the line in Stroke to fit the size of your leave
Use the Node Tool to change the size of the line
6. Node Tool: Grasp the line in the middle and pull it in the curve.
Styles panel: Gradientplay: Select Styles 8
7. Go up the Layer... Expand Stroke
8. Top: Set Stroke to 0.6, or what suits your image
9. Take the Pencil Tool and draw as here belowe
10. Styles panel select Styles 2
Now it looks like this:

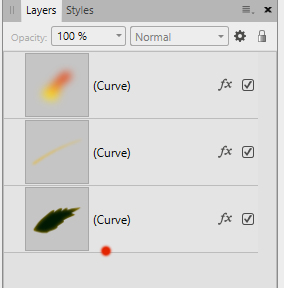
11. In the Layer panel: Mark the layer with the leaf and the line
12. Pull them down the base with the leaf... drop the mouse on the line: where you see my red dot here below:
Now the whole color inside the leaf
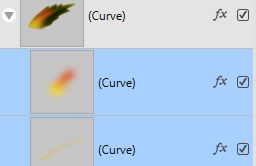
13. Press the small triangle in the Layer panel at the blade to merge the 3 layers. They are still there, but the two layers are hidden
14. Press the leaf... Hold down CTRL and press J 7 times so you have 8 leaf
15. Now you can flip and turn them as it suits, and put them on the stem. Use the Move Tool: 
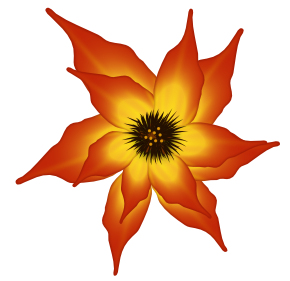
Look at my finished picture.
Rehders-Design
©