
Light
Get materials here
christmas_misted.psp, animalwreath.psp, Gardin_rehder.psp, Nisse_Rehder.psp is tubes
Open the font: OLDENGL.TTF and minimize
1. Create a new Image 800x625
2. Fill the Image with this color: #375618
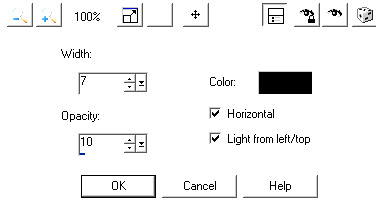
3. Go up in Effect ... Texture Effect ... Blinds with this settings:
4. Go again up in Blinds and take away check in Horizontal
5. Go up to Image ... Add Border 2 ... check in Symmetric ... red color
6. Maksime the Image
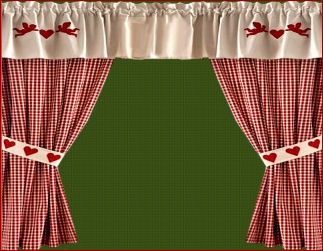
7. Place the tube Gardiner
8. Take Pick Tool
9. Keep in the middle box,s on Pick Tool marking
10. keep and drag the tube like you see here under:
11. Go up to Adjust ... Brightness and Contrast ... Clarify 3
12. Go up to Adjust ... Brightness and Contrast ... Brightness/Contrast ...
Brightness 11 ... Contrast 13
13. Go up to Adjust ... Sharpness ... Sharpen
14. Duplicate the gardin
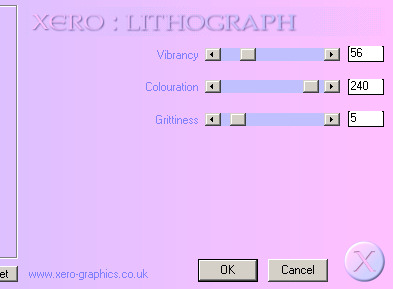
15. Go up to Plugins ... Xero ... Lithograph ... and set this settings:
16. Set the layer Blend Mode ... Soft light
17. Close the bottom layer and Merge Visible
18. Open the layer again and stand on it
19. Place the tube christmas_misted on a new layer
20. Place the tube animalwreath on a new layer
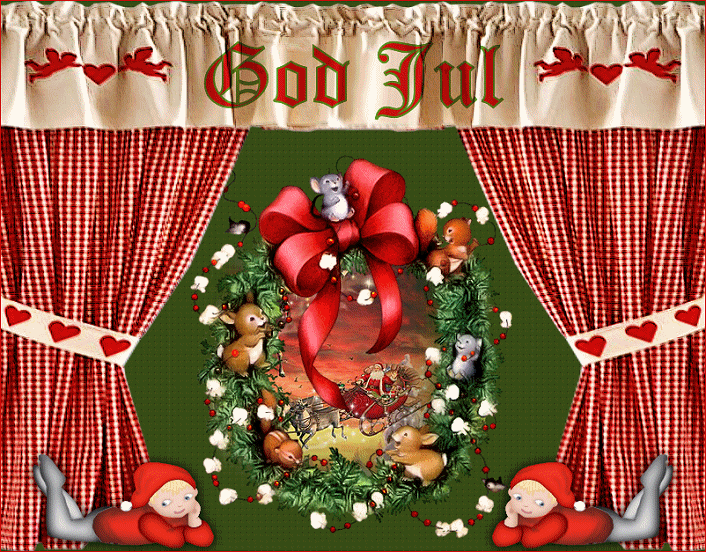
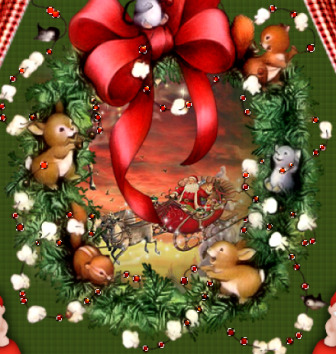
21. Place at the place with Move Tool... Look at my finish Image
22. Close the layer with the garland ... Merge Visible
23. Place tube Nisse_Rehder on a new layer, in the bottom right ... Look at my Image
24. Go up to Effect ... 3D Effect ... Drop Shadows:
black farve ...Vertical: 1 ... Horizontal: minus 1 ... Opacity: 100 ... Blur: 30,00
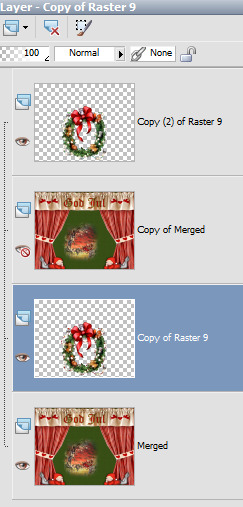
25. Go up to Layers ... Duplicate
26. Go up to Image ... Mirror
27. Take Text Tool Find Old English Text and set this settings:

28. Set the Foreground color to: #40581a and Background color to: #d21412
29. Write merry Christmas like my finish picture
30. Set Drop Shadows if you like it
31. Merge Visible
32. Duplicate the layer so you have 2 Image layers, and Close the layers
33. Open the tube layer with the garland
34. Duplicate
35. Take Selections Tool ... Circle and set this settings:

36. Make a circle around all the ball. Zoom in
37. Go up in View ... customize.
38. Press at unused commands in the left side:
39. Find Black and White points. See with my yellow finger.

40. Take and keep in the little icon :  ... move it up in the linelike here under, and slip:
... move it up in the linelike here under, and slip:
41. Press at icon up there .
42. Into the right side is a lucky dice.
Press at this and see what it can. Maybe you must press more time
43. Do the same om the other layer with the garland, but this ball,s wit the other colors.
44. Go up in Selections ... Select None
45. Open all layers
46. Set the layer likes here:
47. Close the two top layer
48. Merge Visible and close the layer
49. Open other layers
50. Merge Visible
Ik you Resize Image so remember to use Sharpen on both layer .
I resize only the Image to the tutorial here
51. Open now both layer and Save psp animationsshop.
Animation Shop
1. Open the Image into Animation Shop
2. Go up to Edit ... Select all
3. Go up to Animation ... Frame Properties: 25
4. Save the Image
Rehders-design
©