

Kolibrier
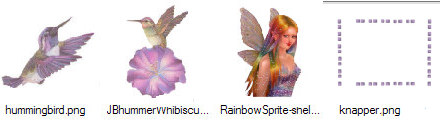
Get the materials here: 
The files in the material like here:
Open the tubes in Paint Shop Pro
1. Create a new image 850x625 pixels
2. Take the Flood Fill Tool ... settings like here:

3. Set the foreground color to: # f5a5d8 ... and background color to white
4. Go to the color palette ... and Gradients ... Find The gradient: foreground / background
Settings like here and press ok ... Fill the image with the gradient

5. Go to Layer Palette ... right ... Duplicate
6.Go up in Image ... Mirror ... Mirror Horizontal (in older Psp: Image ... Mirror)
7. Go to Layer Palette ... set the layer opacity to 50
8. Go to Layer Palette ... right click... merge visible
9. Go up to Effects --- Edge Effects ... enchange more
10. Go up to Effects --- Edge Effects ... Erode
11. Go up to Effects --- Edge Effects ... Dilate
12. Go up to Effects ... Edge Effects ... Enchance More
13. Go up to Adjust ... Sharpness ... Sharpen More
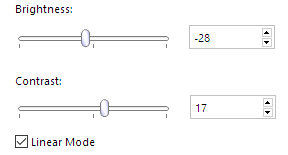
14. Go up to Adjust ... Brightness and Contrast ... Brightness / Contrast
Settings like here, and press ok:
15. Open the tube: buttons ... rightclick in the bar at the top of the tube ... press Copy in it appears.
16. Go to your working image ... Right in the bar at the top ... press Paste as new layer
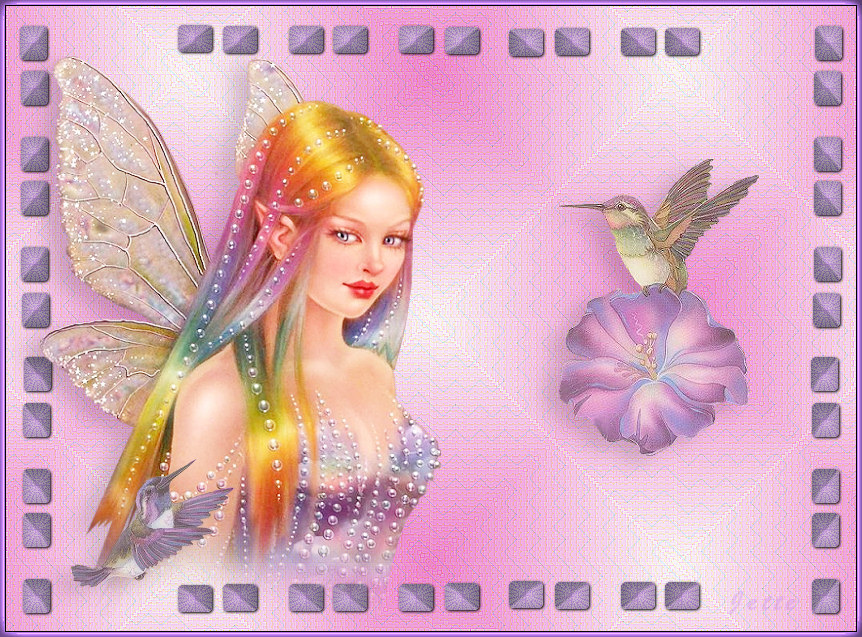
Set the Frame at the place. Look at my finish Pictures
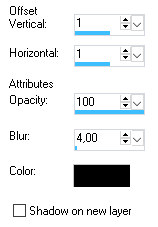
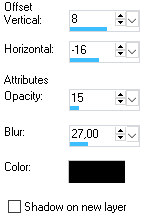
17. Go up to Effects ... 3D Effects ... Drop Shadow ... black color ... settings like here, and press ok
18. Open the tube: RainbowSprite-shel.png ... Right click in the bar at the top of the tube ... press Copy in what appears
19. Go over your working image ... Right in the bar at the top ... press Paste as new layer
20. Go up in Image Resize to 829 x 610 pixels ... no check in resize all layers
21. Take Selection Tools Freehand ... Freehand ... settings like here:

22. Move the lady up so it's easier to draw selectionen
Draw a selection on the bottom of the lady. When you release the selection becomes larger and it is ok
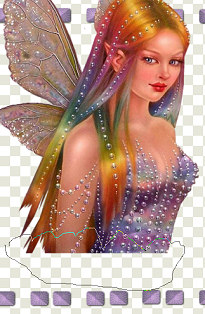
23. Press the Delete key on your keyboard 4 times
24. Move the tube into place on the left side, as my final image.
25. Go to Layer Palette ... right click... Duplicate
26. In the layer palette, Blend Mode: Set the layer to ... Screen ... and Opacity to 85
27. Press the bottom layer with the lady
28. Go up to Effects ... 3D Effects ... Drop Shadow ... black ... settings like here, and press ok
29. Go to Layer Palette ... press on the top layer
30. Open the tube: Hummingbird ... Right click in the bar at the top of the tube ...
press Copy in what appears
31. Go to your working image ... Right click in the bar at the top ... press Paste as new layer
Move the bird to the lady ... like my finish picture
32. Copy / Paste tube: JBhummerWhibiscus-MLG like 30 and 31
33. Go up to Effects ... 3D Effects ... Drop Shadow ... settings like here, and press ok
34. Move the flower with the bird in place
35. Write your name on the picture
36. Go up in Image ... Add Borders ... check in symmetric ... set numbers to 1 ... black color ... press ok
37. Add Borders again ... set numbers to 5 ... color: # 816c91 ... press ok
38. Take Magic Wand Tool ... set Feather to 0
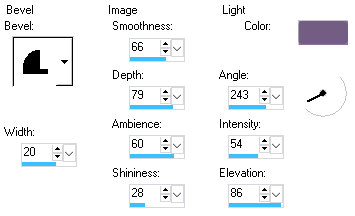
39. Go up to Effects ... 3D Effects ... Inner Bevel ... settings like here, and press ok :
The color is this: # 735D83
40. Go up to Selections ... Select None
Rehders-Design
©