


1. Create a new 800 x 585 pixel document
2. Rectangle Tool: Make a rectangle around your image
3. Go to the Styles panel ... Category ... Angelwind ... Angelw
4. Layer panel: right-click on the layer ... Rasterise
5. Open the texture from the Material ... right-click on it ... Copy
6. Go over to your work image again ... right click on it ... Paste
7. In the Layer panel ... set the layer Blend: Luminosity and Opacity: 75
8. In the Layer panel: Press the top layer ... right-click... Merge Down and close the layer by removing the notch on the layer
9. Create a new layer
10. Flood Fill with black color
11. Open the tube ... hjoerne rehder
12. Right-click on the tube ... Copy
13. Go back to your work image ... right click on image ... Paste
14. Layer panel ... press the layer ... Hold down CTRL on your keyboard and press j 7 times so you have a total of 8
Smoke them approx. as below, or as you thought:
They do not have to sit in the same places as on mine, they still do not become the same

15. In the Layer panel: Close the black layer
16. In the Layer panel: Tap the top layer ... right-click Merge Visible
17. Open the black layer, the same place where you closed it
18. In the Layer panel: Select all layers between the black layer and the top ... press Delete on your keystroke
19. Press the top layer and go up to Filters ... Distort ... Mirror: try the settings until you have a flower and press Apply.
You can tap directly on the image, hold and move it before pressing Apply.
Or you can move the slider and change the direction. I've done both, and it's fun to play with
The result of mine was this flower that I will use for my image:
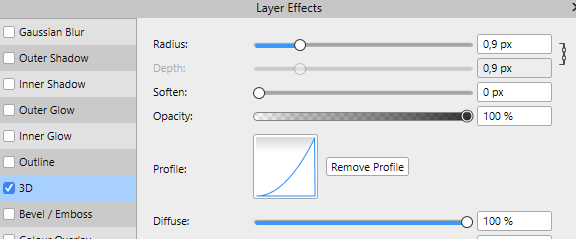
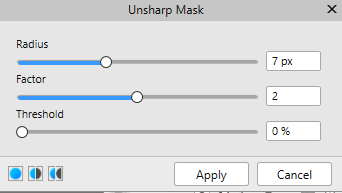
 settings like here below ...
erase everything around the flower so that only it is left

22. Layer panel ... press the layer ... Hold down CTRL on your keystroke and press j 4 times so that you have a total of 5 flowers
Pull them together as below:

23. Shape ... Rectangel Tool: Draw a thin rectangle ... white color so long that it extends beyond your flowers
24. Move Tool ... move the table into place just above the flowers
26. With the Move Tool: move the new table under the flowers ... now mine looks like this:


30. In the Layer panel ... press the layer with the flower table ... Press Delete on your keystroke
32. In the Layer panel: right-click on the black layer ... delete
33. In Layer panel: Open the background layer and press the layer with the flowers
of the flower border and turn the table on the handle
put it in the upper left corner as below:
35. Go to the layer palette ... right click ... Duplicate
40. Go up in Arrange ... Flip Horizontal, and move in place on the right side

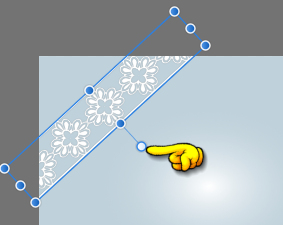
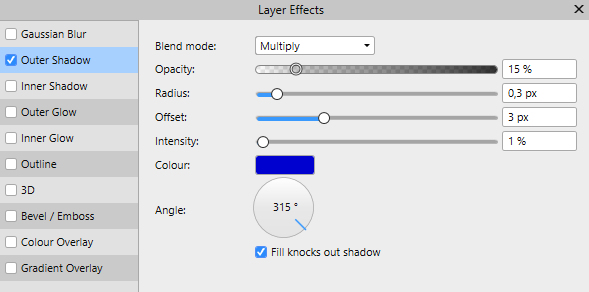
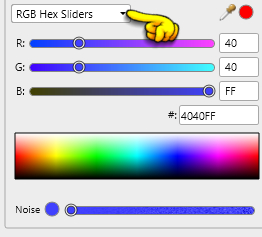
 ... ??To change color; press at the color box ...
 In what appears, press the small black triangle ... select RGB Hex Sliders and insert the color code 4040ff ...
see yellow finger here below right
52. Layer panel: layer with the angel: set layer Opacity 85

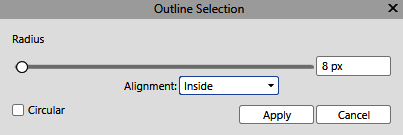
56. Go to Select ... Outline ... set these settings and press Apply:
Remember that it is Inside that must be in Alignment