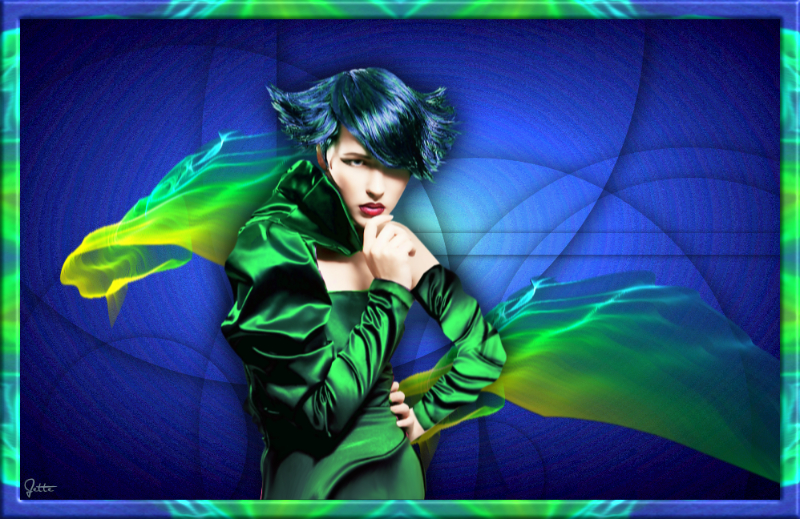
Flowing robes
Get materials here:
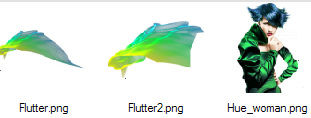
Files in the material + a selections folder:
The tubes should open in Affinity
In the selection folder there is a folder called Flowing.
Save it so you know where it is
1. Create a new Document 950 x 600 pixels (Image)
2. Shapes ... Rectangel tool  : Drag a Rectangle around the image
3. Styles panel (located in the same place as the Layer panel): Category ... Flowing ... fantasy1
4. In the layer panel: right-click on the layer ... Rasterise & Trim ( with that feature all that is out of the picture disappears)
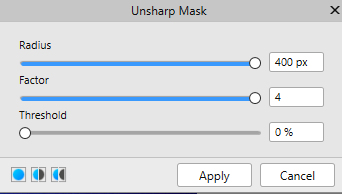
5. Go to Filters ... Sharpen ... Unsharp Mask: set the settings below and press Apply
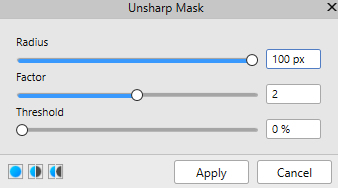
6. Go up in Unsharp Mask again, , set settings like this, and press Apply
7.. In the bottom of the Layer panel: add pixel layer
8. Go up to Select ... Load Selection from file ... browse for the selections ... find Flowing 1
9. Flood Fill: fill with white color and set the layer Blend: Multiply
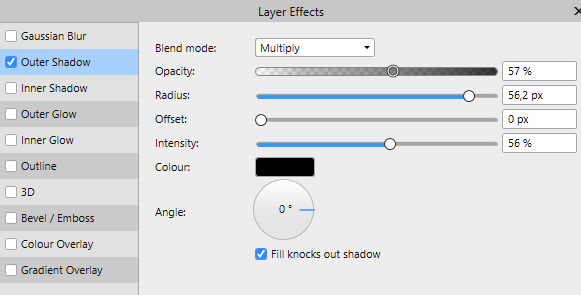
10. Layer panel ... Press  in the bottom :Touch Outer Shadow ... set settings as below:
Remember to check Scale in object: 
11. Go up in Edit ... Copy, here you save the effect in the mouse for later
12. Get all selections as in the same way as before ... one at a time from glowing 2 through glowing 11
See below for what to do with each layer:
Create new layer ... Load selection from file: Flowing2: fill with white colour ... Go up in Edit ...Paste xf
In Layer panel... set layer Blend: Multiply
Create new layer ... Load selection from file: Flowing3: fill with white colour ... Go up in Edit ...Paste xf
In Layer panel... set layer Blend: Multiply
Create new layer ... Load selection from file: Flowing4: fill with white colour ... Go up in Edit ...Paste xf
In Layer panel... set layer Blend: Multiply
Create new layer ... Load selection from file: Flowing5: fill with white colour ... Go up in Edit ...Paste xf
Create new layer ... Load selection from file: Flowing6: fill with white colour ... Go up in Edit ...Paste xf
In Layer panel... set layer Blend: Multiply
Create new layer ... Load selection from file: Flowing7: fill with white colour ... Go up in Edit ...Paste xf
In Layer panel... set layer Blend: Multiply
Create new layer ... Load selection from file: Flowing8: fill with white colour ... Go up in Edit ...Paste xf
In Layer panel... set layer Blend: Multiply
Create new layer ... Load selection from file: Flowing9: fill with white colour ... Go up in Edit ...Paste xf
In Layer panel... set layer Blend: Multiply
Create new layer ... Load selection from file: Flowing10: fill with white colour ... Go up in Edit ...Paste xf
In Layer panel... set layer Blend: Multiply
Create new layer ... Load selection from file: Flowing11: fill with white colour ... Go up in Edit ...Paste xf
In Layer panel... set layer Blend: Multiply
13. Go up in Select ... Deselect
14. Open the tube with the lady ... Press the tube ... right-click ... Copy
15. Go to your work image again ... press ... right click ... Paste
16. In the Layer panel in the bottom ... Press eg ... tick Outer Shadow ... press the line to activate (blue)
set options like below, r and set notch at the bottom, by Scale with Object
17. Copy / Paste the other two tubes to the image in the same way as before
18. On layer with the lady : for above press Move to Front, see red dot here:
19. Move all tube in place with Move Tool
20. Set your name on the picture
21. In Layer panel right-click on the top layer ... Merge Visible
Disregard the underlying layers, they are no longer used as it is all assembled into the new layer
22. Layer panel: right-click ... Duplicate
23. Layer panel ... right-click ... Rasterise
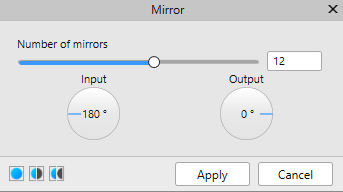
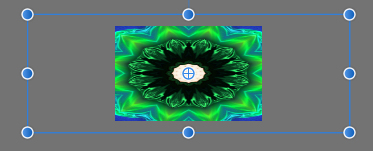
24. Go up in Filters ... Distort ... Mirror ... settings like here below , and press Apply
25. Move Tool ... drag all pages beyond the edges of the image so that the great colors go beyond as below:To extend beyond the edges, zoom out. If you have a mouse with scroll, you can zoom in and out on it
otherwise, go to View above and zoom out
26. Layer panel... right-click ... Rasterise & Trim
27. Go up in Select ... Load selection from file ... Flowing_frame
28. Press Delete on your keystroke
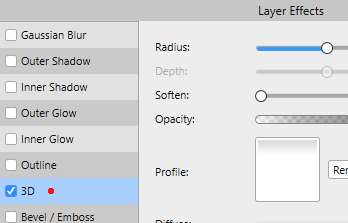
29. Layer panel in the bottom: press on  ... check in 3D ... set Radius as you thought
30. Save your image
Rehders-Design
©
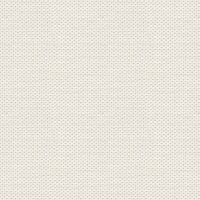


 : Drag a Rectangle around the image
 in the bottom :Touch Outer Shadow ... set settings as below:


 ... check in 3D ... set Radius as you thought