
The material can be downloaded here:


Go to Styles: import Styles. If you don't know how to do, you can see this:
1. Create a new Document 850 x 650 px
2. Shapes:Rectangel Tool ... Make a rectangel omkring hele dit billede
3. Go to Styles Panel ... Category: ray of sun
select Gradient: Background
4. Create a new pixel layer ... fill with white color
5. Open the file: ray_ of_sun_mask ... right click on it ... Copy
6. Go over to your work picture again... right click on it ... Paste
7. Fit the mask to the image with Move Too.l by dragging and pushing the small squares
8. In the Layer panel ... Right-click... Rasterise two masks
9. I Layer panel ... Right-click... Merge Down
10. Insert the layer Opacity into the Layer panel above to 40
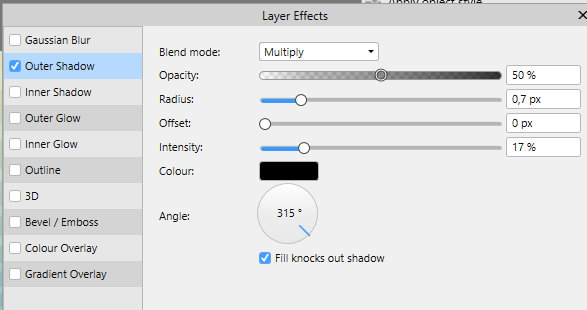
11. For example, press at the bottom of the Layer Panel --- set the click in outher shadow and set options as here:
Remember to put the checkmark in scale with object
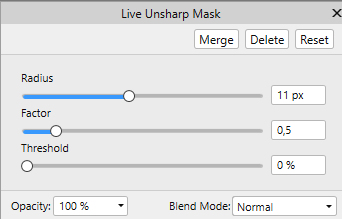
12. Go up in Filters... Blur... Zoom Blur ... set Radius to 11
13. I Layerpanelet ... højreklik ... Merge Visible
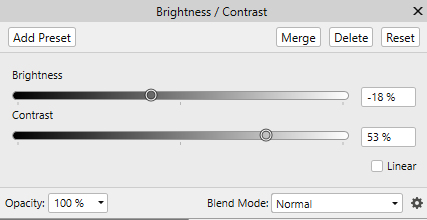
14. Layer Panel: at the bottom ... press in Adjustments ... select: Brightness/Contrast ... set settings as here below:
15. In the Layerpanel ... right click ... Rasterise
16. In the Layer Panel ... in the same placeas before but press in  ... select Clarity ... Strength 15 and press Merge
17. Open the file: cherry ... right click on it ... Copy
18. Go over to your work picture again... right click on it ... Paste
19. Press on Move Tool ... go up in Arrange ... Flip Horizontal ... Set the layer Opacity 95
20. Open file: girl2 ... right click on it ... Copy
21. Go over to your work picture again... right click on it ... Paste
22. In the Layerpanel ... set the layer Blend: hardlight and opacity 95
23. Open the file: Sunshine ... right click on it ... Copy
24. Go over to your work picture again... right click on it ... Paste
25.In the Layerpanel ... Set the layer Blend: Multifly
26. Open the flower ... Copy/ Paste as before
27. In the Layerpanel ... right click... Rasterise ... set in place on the right side
28. In the Layerpanel ... right click... ... Duplicate
29. Press on Move Tool ... Go up in Arrange ... Flip Horizontal ... set in place in left side
30. Shapes:Rectangel Tool... Make a rectangel in the left side ... look screen here under:
31. Go to the Styles Panel... Category: ray of sun select Gradient: Background
32. In the Layer panel ... right click ... Rasterise33. In the Layer panel ... right click ... duplicate
34. Press CTRL and press at the little image on the layer in the layerpanel
35. Go up in Filters ... Distort ...Twirl : Angle 720 ... Radius 460 ... set the layer Opacity 45
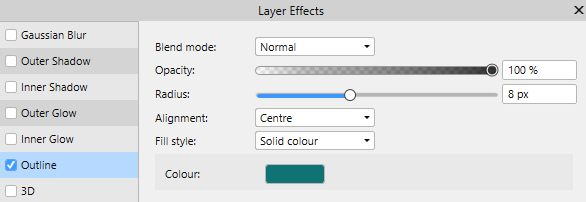
36.Go up in Select ... Deselect
37. Move all tubes into place
38. In the Layer Panel ... Merge visible
39. In the Layer panel in the bottom ... tryk på fx ... press on Outline ... use a color that matches the image.