
Twice
The matrial can be downloaded here:

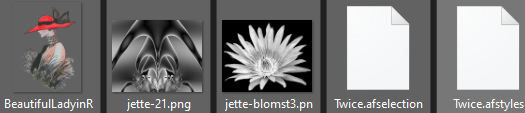
Files in the folder:
Plugins Vdl Adrenaline kan hentes her
When you need the plugins then it is called : VanDerLee
Import Styles Category .
If you don't know how, you can see it on the pdf file in the material.
jette-21, jette-blomst3 , BeautifulLadyinRedHat&Feathers~Lil01-01-05. open in Affinity
You can download the old Animation Shop here:
Do not open file: Twice.afselection before prompted
Start to import Styles before you begin
1. Create a new Image 950 x 575
2. Flood Fill: Black Color
3. Shapes ... Recktangel: make a rectangel around your image
4. Go to styles panel ... Category:Twice ... Press the gradient: redsk-jr
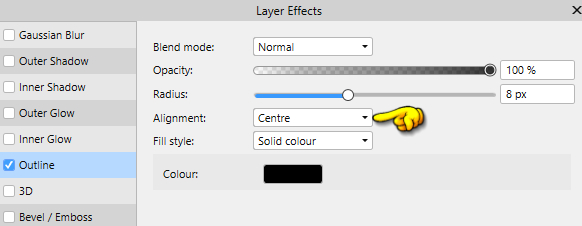
5. Press e.g. at the bottom of the Layer Panel --- tick outline ... set of settings as below:
Black colour ... remember to tick the scale with object
6. In the Layer panel ... Right-click... Merge visible
7. Select all the layers that are below the merge layer ... press Delete on the keyboard
8. In the Layer panel ... Right-click... Rasterise
9. Go op in Select ... load selection from file
The selection now sits in the picture ... let it sit until it says otherwise
10. In the Layer panel ... Right-click... Duplicate twice so you have 3 layers
11. In the Layer panel ... Close the top two layers and sit down in the lower
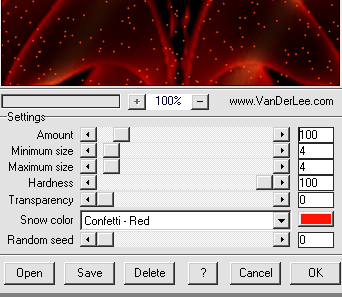
12. Gå op i Effect ..... plugins..... VanDerLee Adrenaline .... Snowflakes
and set these settings :
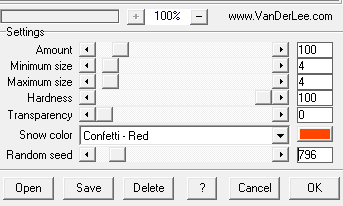
13. In the Layer panel: open the middle layer and press it
14. Gå op i Effect ..... plugins..... VDL Adrenaline .... Snowflakes
and set these settings :
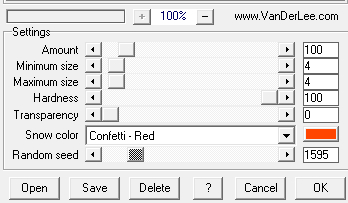
15. Open the top layer and press it
16. Gå op i Effect ..... plugins..... VDL Adrenaline .... Snowflakes
and set these settings:
17. Gå op i Selections ... Select none
18. Shapes ... Rectangel ... Make a Rectangel about your picture
19. Go to styles panel ... Category:Twice ... Press the gradient: redsk-jr
20. In the Layer panel ... Right-click... Rasterise
21. Open the file: jette-flower3 ... go up in Edit ... Copy
22. Tap your work picture ... go up in Edit ... Paste
23. In the Layer panel ... Right-click... Rasterise to mask
24. In the Layer panel ... Right-click... merge down
25. Press Move Tool
26. Go up in Arrange ... flip Vertical ... move the flower into place above
27. In the Layer panel ... Right-click... Duplicate the layer with the flower 2 times, so you have three layers with the
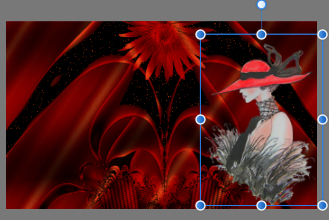
28. Open the BeautifulLadyinRedHat&Feathers file ... go up in Edit ... Copy
29. Tap your work picture ... go up in Edit ... Paste
30. Customize the tube with Move Tool and move into place on the right side, as below:
31. In the Layer panel ... Right-click... Duplicate
32. Press Move Tool
33. Go up in Arrange ... flip Horizontal ... move the lady into place on the left side
34. In the Layer panel ... Right-click... Merge down
Now the two layers with the ladies should be assembled in one layer
35. In the Layer panel ... Right-click... Rasterise
36th In the Layer panel ... Blend Layer: Hardlight
37th In the Layer panel ... Right-click... Duplicate the layer with the ladies 2 times so you have three layers
38. With Move Tool: jerk all layers as here under ... background, ladies and flower, background, ladies and flower
39. In the Layer panel ... press a women's layer ... right-click Merge Down
40. Press next lady layer ... Merge Down
41.Press the third lady layer ... Merge Down
42. Now do the same with the Floral Layers... Merge down
Now you have 3 layers left
Go up in File ... Export to Psd
ANIMATIONSSHOP:
1. Open the psd image in Animation Shop.
2. Go up in Edit.... select all
3. Go up in Animations..... Frame Proberties and set it to 25
4. Save the image, it automatically becomes the file as it should be.
Rehders-Design
©