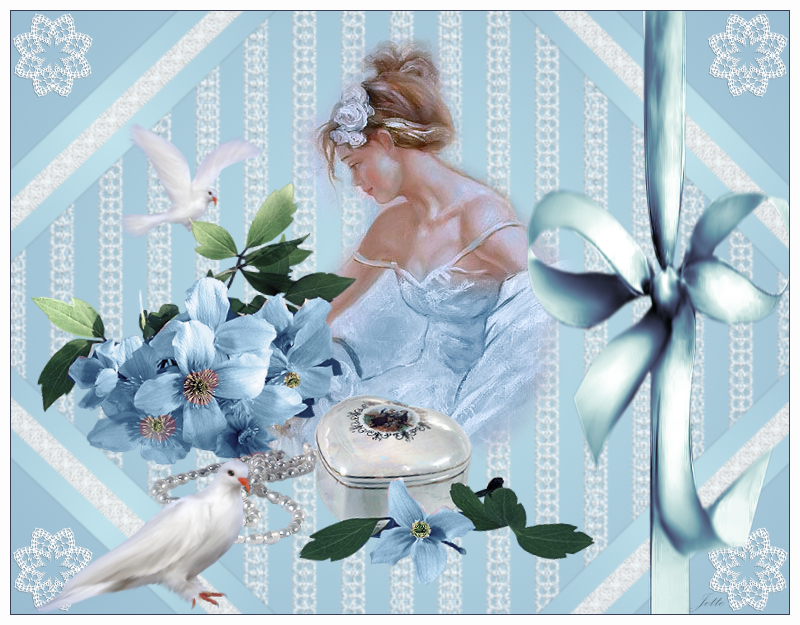
White Lace
Files in the material
:
Lace background and the two selections ... save until you are prompted to open them
files: 7 tubes + 1 gradient, a lace background and 2 selections
Before you begin you must : Import Styles: White Lace. On the link below you can see how to do:
1. Create a new Document 800 x 625
2. Shapes:Rectangel ... Make a rectangel around your entire image
3. Go to the Styles Panel... Category: White Lace ... select Gradient: Background
4. In the Layer panel ... Right-click... Duplicate
5. In the Layer panel ... right-click the duplicated layer ... Rasterise
6. Press g on your keyboard ... Gradient Tool is now enabled
7. Go up in the Comtext line... press the little black triangle and select Bitmap Look at the red brackets.
Brows you through to the file Lace1 ... tap it and open
Now the lace sits in the picture ... make sure Extend is up for wrap like here below:
( Wrap makes it seamless )
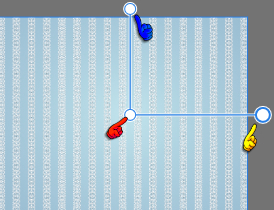
8. Adjust the Blonde by using the handles to rotate it so that the stripes are vertical (see blue and yellow fingers)
Handles by yellow finger determine size in width ... push the handle in until you have 16-18 stripes
The blue finger shows handles that determine the height ... mine stands like that
Handle by red finger, you can move the center with
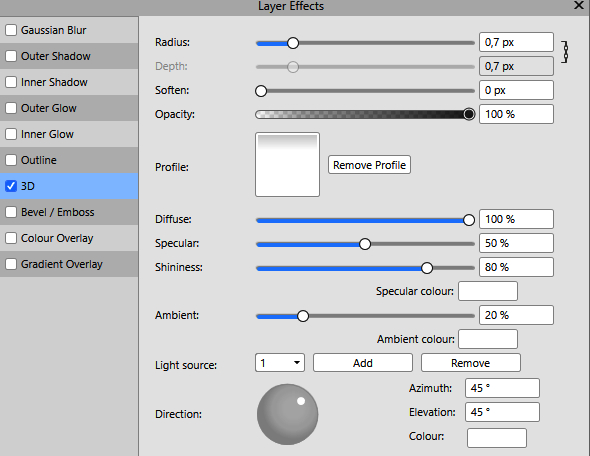
9. In the Layer panel in the bottom bunden ... press fx ... check in 3D ... settings like here under:
Remember check in Scale with Object
10. In the Layer panel ... Close the layer by unchecking the square
11. In the Layer panel ... Press the bottom layer ... right click ... Rasterise
12. Go up to Select ... Load Selection From File ... browse to the selection: Border
13. In the Layer panel ... right-click Copy
14. In the Layer panel ... right-click Paste
15. Go up to Select ... Deselect
16. Go up the Arrange ... Move to Front
17. Press V on your keyboard . Move Tool is now enabled push to left as below:
18. Open the tube: Innerbord ... set on the blue border
19. Layer panel... press on the layer with the blue border ... Hold CTRL down and press on the little picture on the layer.
the border is now selected
Let the selection stand
20. In the Layer panel ... press on the layer with the white lace border
21. Go up to Select ... Invert Pixel Selection
22. Press Delete on your keyboard
23. Go up in Select ... Deselect
24. In the Layer panel ... right click ... Merge Down
25. In the Layer panel ...open the layer with the lace background the same place where you
close it and press it
26. Go up in Select ... Load Selection From File ... brows dig til selectionen: corner, open, and
press Delete on your dit tastetur
27. Go up in Select ... Deselect
Now mine looks like this below:
28. In the Layer panel ... højreklik på blonde baggrunden ... Merge down
29. In the Layer panel ... press on layer with the border borden ... hold CTRL nede mens du trykker J tre gange
You have now 4 layer with borders
30. With the Move Tool ... move and rotate the borders ... place them on the edge of the lace as below:
31. In the Layer panel ... select all layers with borders by holding down CTRL and pressing the layers ... right-click ... Group
32. In the Layer panel at the bottom ... press fx ... check in Outer Shadow ... settings as below:
33. In the Layer panel of the Group layer ... right click ... Rasterise ...
Remember to check Scale with Object
34. In the Layer panel ... Rasterise & Trim
35. In the Layer panel ... right click ... Merge Down
36. Open the file: Lace4_Rehder ... right click on the little lace ... Copy
37. Go to your work image again ... right click on it ... Paste
38. Hold down CTRL ... and press J three times ... there are now foure corner lace and the sides on top of each other
39. Move Tool: move the lace into place in all corners
40. Set all tubes on your picture,
41. insert the tube in the same way as before put the tube in the same way as before, in this order:
42. Woman, flowers, bow and eventually the doves
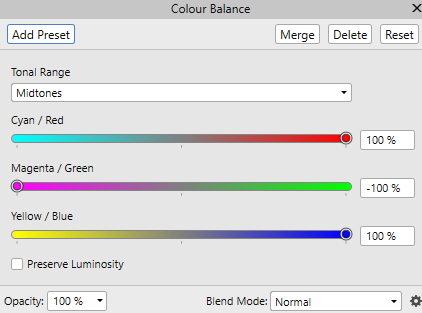
43. In the Layer panel ... press the layer with the bow
44. In the Layer panel at the bottom ... tap Adjustment  . .. set the settings below and press Merge:
45. In the Layer panel press the layer with the small dove
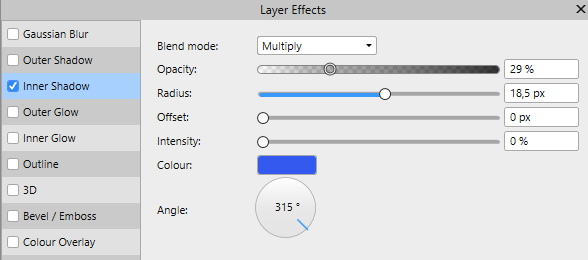
46. In the Layer panel in the bottom ... press on fx ... in what's coming up ... check in Inner Shadows, and
set settings as below:
47. Go up in Edit ... Copy
48. In the Layer panel ... Press the layer with the big dove
49. Go up in Edit ... Paste fx
50. In the Layer panel ... Rasterise & Trim
51. In the Layer panel ... Merge visible
52. Go up the Select ... Select All
53. Go to Select ... Outline ... set settings like here and press Apply
54. Flood Fill Tool ... fill the selection with a color from the dark part of the loop
55. Go up the Select ... Deselect
56. In the Layer panel ... Merge Down
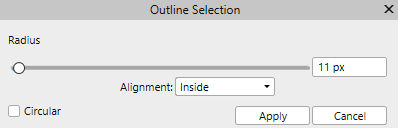
57. Go up the Select ... Select All
58. Go to Select ... Outline ... Alignement: Inside ... set the radius to 10 and press Apply
59. Write your name on the image and export to jpg
Rehders-Design
©