

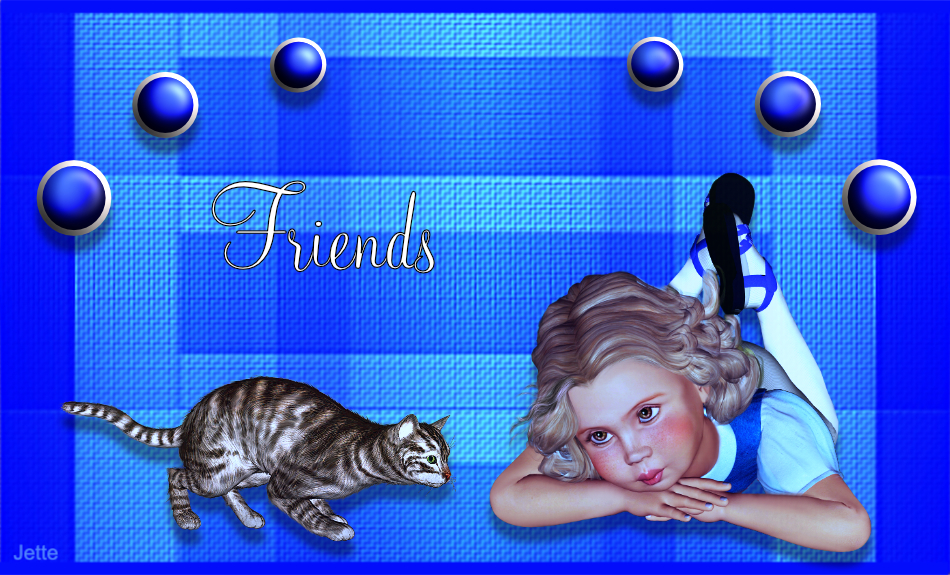

Files in the material: 1 mask, 1 texture, styles ,, and 4 tubes
Styles category must be Imported. If you do not know how to do this you can see it at the link below:
Tuber Texture and the mask must be opened in Affinity Photo
3. Flood Fill Tool ... fill the image with this color: 7DD1FE
4. Shapes ... Rectangle Tool: drag a rectangle around the image
5. Styles panel: Category Friends ... press Style1
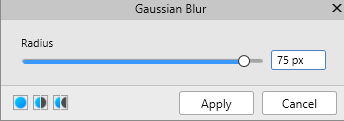
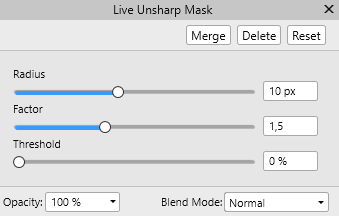
7. Go up iFilters ... Blur ... Gausian blur
8. Open the mask from the Material ... right-click on it ... Copy
9. Go over to your work image again ... right click on it ... Paste
With Move Tool: adjust the mask to the image
10. Layer panel ... right click ... Rasterise to Mask:
11. Layer panel ... right click ... Merge Down
20. Go up in Select ... Load Selection From File.
Browse to the selection: Friends in the material
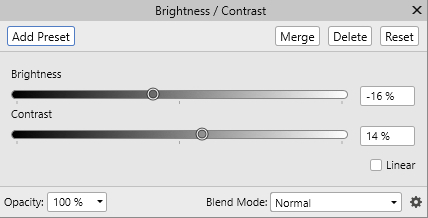
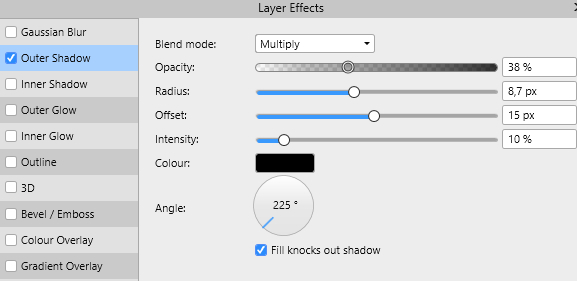
21. Go up in Layer ... New Adjustment Layer ... Brightness / Contrast ... set settings and press Merge:
23. Open the image Texture ... right-click on it ... Copy
24. Go back to your work image ... right click ... Paste
With Move Tool: adjust the texture to the image
Set the layer Blend: Overlay
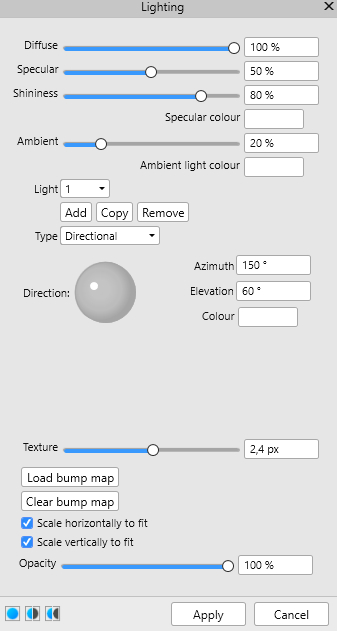
25. Go up in Filters ... Lighting: set type to Directional. Set all settings and press Apply
28. Go up to Select ... Load Selection From File ... Browse to Selection: frame from the material
29. Flood Fill: fill the selection with this color: 030DFC
31. Go to your work image ... Right-click on the image ... Paste
Move the tube into place, as in my finished picture
32. Insert the tube: with the cat, in the same way as before
Pull the tube into place
33. Put the tube with the buttons on and put in place
35. Write your text on the picture. I have written Friends and used text type Monterey BT size 30 pt
36. Put your name on the picture
38. Export your image to jpg and save