

Affinity Designer
TULIP with shader
This tutorial is for guidance only, maybe other settings are better for you.
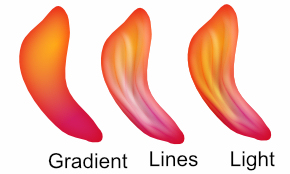
It is an example of how you can get shades of color, and light in your flowers.
1. Create a new Document 800 x 800 pixel
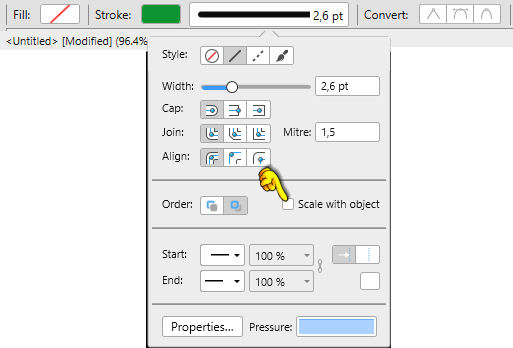
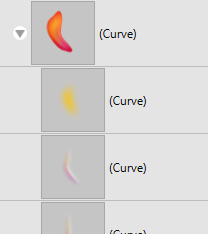
2. Pen Tool with this settings:
3. Draw a stalk with a green colour: 0D9532
4. Stroke: 
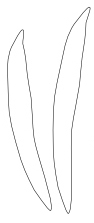
Draw two leaves
5. Switch the color by pressing the curved arrow

6. Give Gradient: 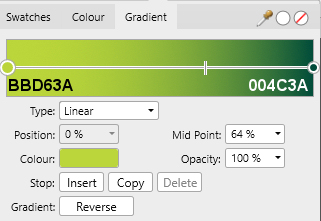
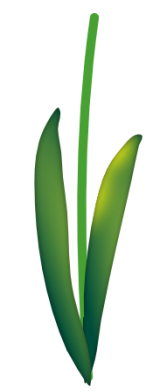
7. Turn Leaves slightly with the Move Tool, and move them into place on the stalk
8. Draw light with yellow colour and set the Layer blend: Overlay
9.Give the light Gausian blur so it looks soft. Remember check in Scale with Object. I use 2,2
10. Pencil Tool: Draw a petal ... Stroke:

11. Switch Colour
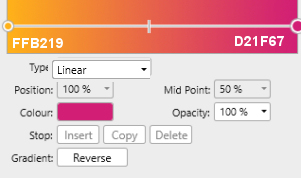
12. Gradient:

13. Pencil Tool: draw lines to the petal . Stroke: same settings like before
The bigger your petal is, the bigger the strokes must be
see the lines in relation to the petal on screen below
14. Select all lines layer ... give the same Gradient as before.


15. While it is selected: Go up in layers ... Expand Stroke
,
16. In the layer: Blend Colour Dodge 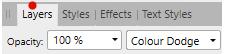
Press fx in the bottom of the Layer Panel
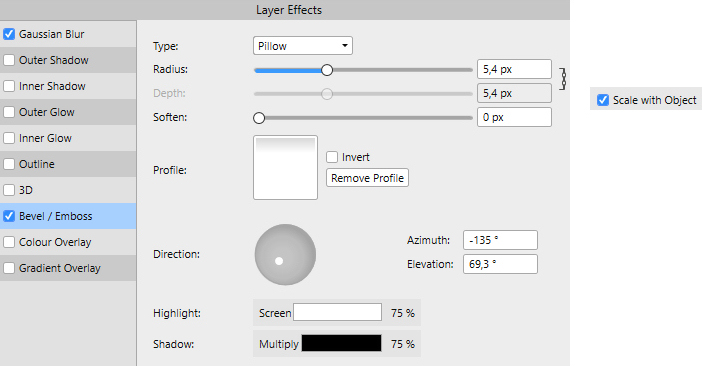
17. Settings like here below ... check in Bevel/Emboss ... remember checkmark in scale with Object
18. Press at fx in the bottom of the Layer Panel. Check in Gausian Blur, and set Radius 2,2

The line layers are still selected
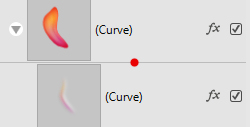
19. Pull the layers down under the Petal layer.
Press the line between the layers ..... release the mouse button where you see the red dot below
20. Make the other petals the same way. Duplicate the layer with the first petal. , and Flip Horizontal
Then you are missing the middle petal. See the picture below on the right. Put the petal in place

21. Make the last petal in the same way as the other two
22. Pull the layer down under the other 2 petals and move the petal in place
You have now 3 petal
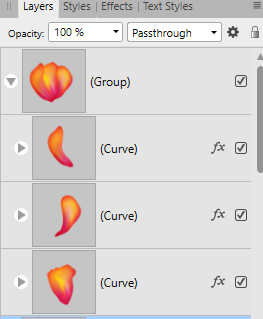
23. In the Layer Panel: select all 3 petal layer, right click ... Group
Now my layers look like this
25. Set Blend to Overlay.
The shape of the light is not that important. it just has to sit in the right place. Gausian Blur should be s
et differently depending on the size of your petal. Try your way through the settings
26. Do it with all tre petal 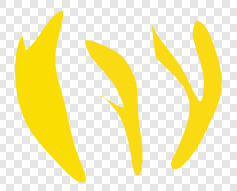 Colour: F9DA13
Colour: F9DA1327. Give Gausian blur like before ... see what it looks like, and correct it if it is not as it should be
You can use other colors to your light, and other Blend
28. Put the tulip into place on the stem
The upper layers now lie like this in each petal:
29. Save your image
Rehders-Design
©