
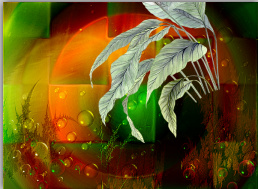
Blandede farver
Materials here: 
Files in the material like here:
 + A gradient
 Open the tubes in Paint Shop Pro
The gradient should be in the folder: Documents \ Corel Paint Shop Pro \ 17.0 \ Gradients
in older PSP: The gradient should be in the folder: My PSP Files \ Gradients
1. Create a new image 850 X 625 pixels
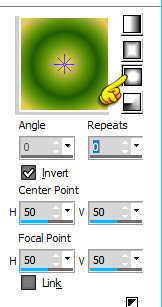
2. Go to Gradients ... find Gradient. Bubble_rehder ... settings like here:
Remember check in Invert
3.Choose Flood Fill Tool ... fill the picture with the gradient
4. Go to Effects ... Artistic Effects ... Neon Glow ... Detail set to 90 ... Opacity to 80 and press ok
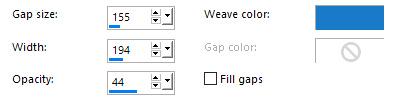
5. Go up to Effects ... Texture Effects ... Weave ... settings like here and press ok:
color is: # 1a7ac8
6. Go up the Artistic Effects ... Colored Foil ... settings like here and press ok

7. Opret et nyt lag 7. Create a new layer
8. Gå op i Selections ... Select all 8. Go up to Selections ... Select all
9. Åben billedet Tile_jr og Gå op i Edit ... Copy 9. Open the image Tile_jr and go up to Edit ... Copy
10. Gå tilbage på dit arbejdsbillede 10. Go back to your work image
11. Gå op i Edit ... Paste into Selection 11. Go up to Edit ... Paste into Selection
12. Gå til layerpaletten ... sæt Blend Mode til Hard Light 12. Go to the layer palette ... Set Blend Mode to Hard Light
13. Bliv i Layerpaletten ... højreklik på laget ... Merge Visible 13. Stay in the Layer Palette ... right click on the layer ... Merge Visible
14. Gå op i Selections ... Select None 14. Go up to Selections ... Select None
15. Åben tuben: WS1-FL_FonsG_Leaves040710.psp... Højreklik i bjælken for oven på tuben ... 15. Open the tube: WS1-FL_FonsG_Leaves040710.psp ... Right in the bar at the top of the tube ...
tryk Copy i det der kommer frem press Copy in what appears
16. Gå over på dit arbejdsbillede ... Højreklik i bjælken for oven ... tryk Paste as new layer 16. Go over your working image ... Right in the bar at the top ... press Paste as new layer
17. Ryk bladene på plads ca. 17. Move the leaves in place about som her under: as below:
18. Gå til layerpaletten ... sæt Blend Mode til Overlay 18. Go to the layer palette ... Set Blend Mode to Overlay
19. Bliv i layerpaletten ... højreklik ... Duplicate ... Nu har du to lag med blade 19. Stay in the layer palette ... right ... Duplicate ... Now you have two layers with leaves
20. Gå op i Image Mirror ... Mirror Horizontal (I ældre psp Image ... Mirror) 20. Go up in Image ... Mirror Mirror Horizontal (In older PSP Image ... Mirror)
21. Ryk bladene på plads i øverste venstre hjørne ... se på mit færdige billede 21. Move the leaves in place the upper left corner ... look at my finished image
22. Bliv i layerpaletten ... stå på øverste blad lag ... ret Blend mode til Hard Light 22. Stay in the layer palette ... stand on the upper leaf layer ... right Blend mode to Hard Light
23. Open the tube: WS1-FL_Vector_Flowers090810 ... Right click in the bar at the top of the tube ... press Copy in what appears
24. Go to your working image ... Right click in the bar at the top ... press Paste as new layer
25. Go up in Image ... Resize 323x237 pixel ... no check in Resize all layers
26. Move the flowers in place in the left corner in the bottom
27. Go to the layer palette ... Set Blend mode to Hard Light
28. Put the tube with the lady in the picture in the same way as in 23 and 24
29. Move her in place
30. Go to the layer palette ... right click on the layer with the lady ... Duplicate
31. Stay in the layer palette ... Set Blend mode to Soft Light
It is important that you do not move at the lady after this
32. See that all other tubes are in place
33. Go to Layer Palette ... right click ... Merge Visible
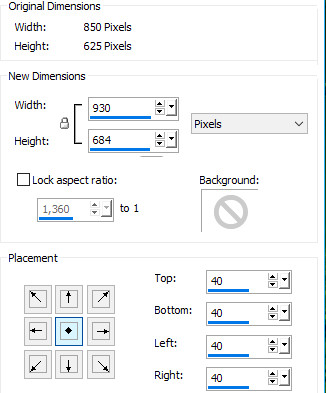
34. Go up in Image ... Canvas Size ... set of settings as below and click ok:
Remember to press in the middle where you see the arrows on the bottom. (The light blue labeled.)
You only set the width and height.
34. Stay in the Layer Palette ... right click ... Duplicate
35. Take Pick Tool ... pull in the four squares in the middle of all sides, so that the image fills
36. Go up in Layers ... Arrange ... Send to bottom
37. Go to Layer Palette ... press the bottom layer
38. Go up to Adjust ... Blur ... Gausian Blur set to 35
39. Go to the layer palette ... right-click the bottom layer ... Duplicate
40. Go up in Image ... Mirror Mirror Vertical (In older psp: Image ... Flip)
41. Go up in Image ... Mirror ... Mirror Horizontal (In older psp: Image ... Mirror)
42. Go to Layer Palette ... set the layer Opacity: 55
43. Go to Layer Palette ... pressure on the top layer
44. Go up to Effects ... 3D Effects ... Drop Shadow ... settings like here and press ok:
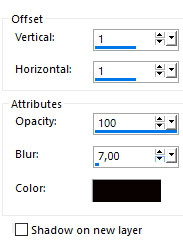
45. Go up to Drop Shadow again ... set minus before1 in Vertical and horizontal ... press ok
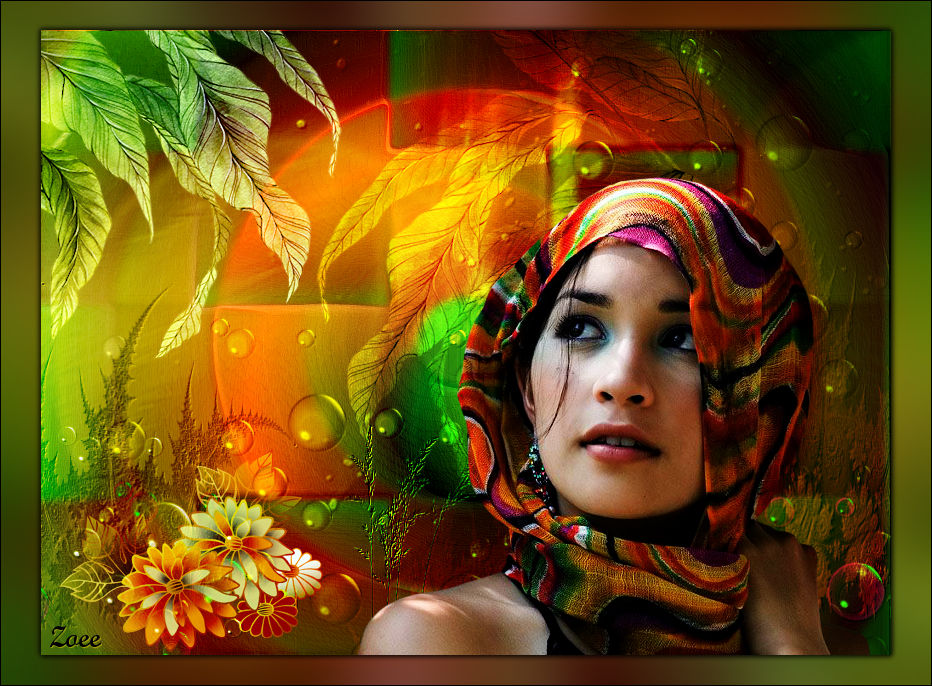
46. Write your name on the picture
47. Go to Layer Palette ... right click ... Merge All
48. Go up in Image ... Add Borders ... notch in symmetric ... choose a dark color from your Image
set of numbers to 1 and press ok
Rehders-Design
©