


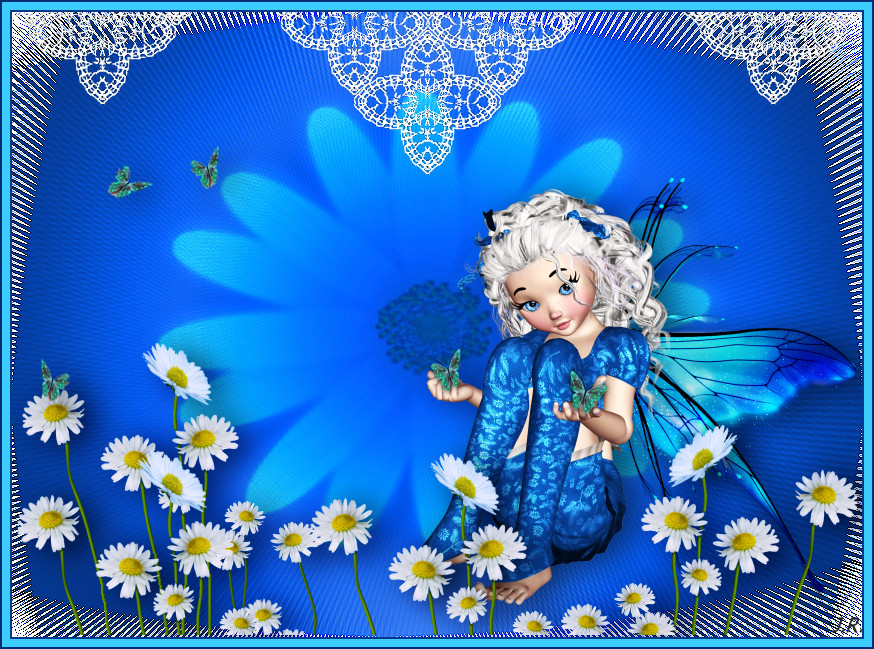
Blue Fairy


 Back
Back
These files below are the material + a Gradient

Open the tubes in Paint Shop Pro
The gradient should be in the folder: Documents \ Corel Paint Shop Pro \ 17.0 \ Gradients
1. Create a new image 850x625. This image we call your work picture
2. Choose the Flood Fill Tool ... fill the picture with white color
3. Create a new layer
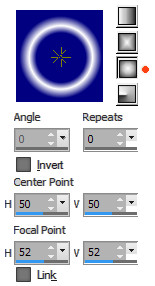
4. Go to the color palette and Gradients ... find gradient: jette_angellight ... settings
like here, and press ok

5. Fill your image with the gradient
6. Go up to Adjust ... Blur ... Gausian Blur set the figure at 86
7. Go up to Effects ... Distortion Effects ... Spiky Halo ... settings like here, and press ok :

8. Go to Layer Palette ... Right-click the layer ... Duplicate
9. Go up in Image ... Mirror ... Mirror Vertical ... (in older psp: Image ... Flip)
10. Go up in Image ... Mirror ... Mirror Horizontal (in older psp: Image ... Mirror)
11. Go to the layer palette ... Set the layer Opacity about 35
12. Go to Layer Palette ... Right-click the layer ... Merge Visible
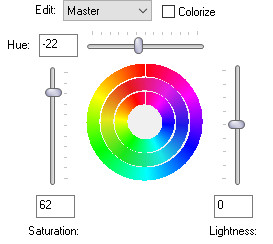
13. Go up to Adjust ... Hue and Saturation ... Hue / Saturation / Lightness
Touch the little black notch at the top ... set it to default

set the other settings as below and press ok:

15. Go up to Effects ... Edge Effects ... Enchange more
16. Open the tube with each flower ... Right in the bar at the top of the tube ... press Copy in what appears
17. Go over your working image ... Right in the bar at the top ... press Paste as new layer
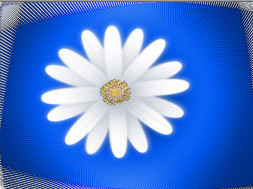
Take Pick Tool:  ... Drag out into the squares in the middle (not the corners) to make it
 ... Drag out into the squares in the middle (not the corners) to make it
 great as below relative to the image

19. Go to Layer Palette ... set layer Blend Mode ... Dodge
20. Stay in the Layer Palette ... set the layer opacity to about 48 48
21. Put the lace on the top in the same way as in paragraphs 16 and 17
22. Go to Layer Palette ... right click ... Merge Visible
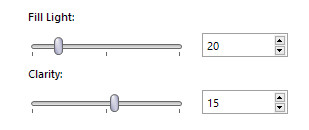
23. Go up to Adjust ... Brightness and Contrast ... Fill Light / Clarity (in older psp Clarify about 15)

24. Put the girl in the picture ... in the same way as before
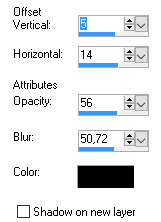
25. Go up to Effects ... 3D Effect ... Drop Shadows ... settings like here, and press ok :

26. Set the butterflies in the same way as before
27. Set maqueritterne on, in the same way as before
28. Give the same Drop Shadow as before
29. Go to Layer Palette ... right-click ... Duplicate
30. Stay in the Layer Palette ... set the layer blend mode to Soft Light
31. Put your name on your picture
32. Go up in Image ... Add Borders ... choose a dark blue color ... 2 pixel ... notch in symmetric
33. Go up in Image ... Add Borders 8 pixels take a light blue color from the image
34. Go to Add Borders again ... dark blue ... 2 pixel
Rehder-Design
©
