

Dragelys.
Get the Material here: 
In older psp, some might import the gradient
The files in the material like here + 1 pspgradient and one for import :

The gradient: Documents \ Corel Paint Shop Pro \ 17.0 \ Gradients
In old Psp:The gradient should be in the folder: My PSP Files \ Gradients
Open the tubes in Paint Shop Pro
1. Create a new Image 850x625 pixels. This image we call your work picture or work Image
2. Choose Flood Fill Tool ... set white color in the foreground color ... fill the picture with color
3. Create a new layer
4. Go to the color palette and Gradients ... find gradient: Ocean Blues ... settings like here, press ok
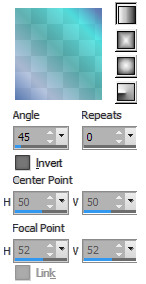
Fill the layer with the gradient
5. Go to Layer Palette ... Right click on he layer ... Merge Visible
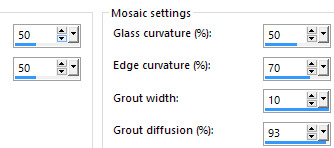
6. Go to Effect ... Texture Effects ... Texture ... Mosaic Glass ... settings like here, press ok
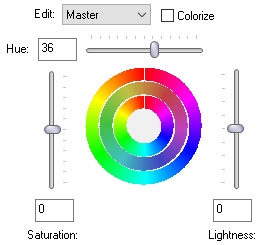
7. Go up to Adjust ... Hue and Saturation ... Hue / Saturation / Lightness
Press the little black at the top ... set it to default

sæt de andre indstillinger som her under, og tryk ok: set the other settings like here, press ok:
8. Go to Layer Palette ... Right ... Duplicate
9. Stay in the Layer Palette ... set layer Blend Mode: Multiply
10. Go to Layer Palette ... Right click ... Merge Visible
11. Open the tube with the cloud ... Right click in the bar at the top, of the tube ... press Copy in what appears
12. Go to your work image ... Right click in the bar at the top ... press Paste as new layer
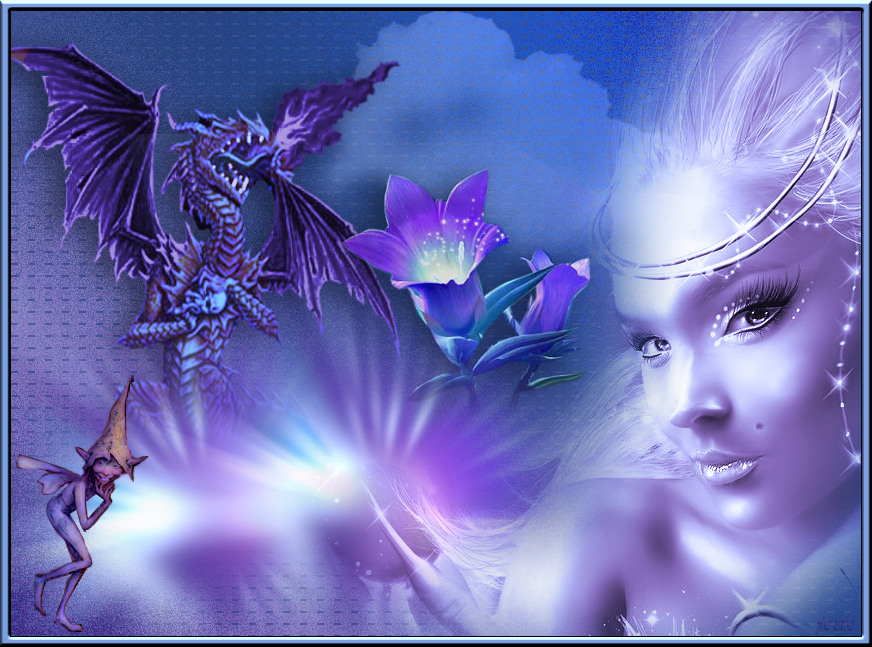
Move it into place at the top as my finish image.
13. Go to Layer Palette ... Set Blend Mode to: Luminance Legacy and Opacity: 25
14. Open the tube with the dragon ... Right in the bar at the top of the tube ... press Copy in what appears
15. Go over your working image ... Right in the bar at the top ... press Paste as new layer
Move it to the right place my finish image.
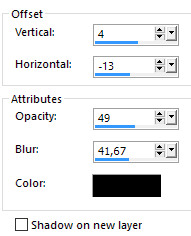
16. Go up to Effects ... 3D Effects ... Drop Shadow. Settings like here, press ok
17. Open the tube with harebell (flower) are ... in the same way as in 11 and 12 ... Move them up a bit as you look at my finished image.
18. Go up to Drop Shadow. Settings are from before ... press ok
19. Open the tube with the angels ... the same way as in 11 and 12
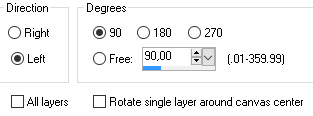
21. Go up to Adjust ... Blur ... Radial Blur ... settings like here, press ok:

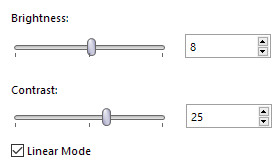
22. Go up to Adjust ... Brightness and Contrast ... Brightness / Contrast ... settings like here, press ok:
23. Go to Layer Palette ... right click... Duplicate
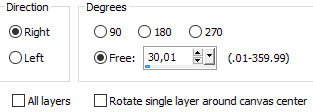
24. Go up in Image Free Rotate ... settings like here, press ok:
25. Put the tubes in place like here, if not already:

26. Put the lady in the picture in the same way as before and jerking her out on the right side as my picture
27. Put the troll on the image in the same way as before and out the left side, as my picture
28. Go up to Drop Shadow. Indstillinger står fra før ... tryk ok Settings are from before ... press ok
29. Insert the name of your image
30. Go up in Image ... Add Borders ... 1 pixel ... black color ... notch in symmetric
31. Go up in Image ... Add Borders 10 pixels ... this color: # 7b9fe1
32. Take Magic wand ... settings like here, press ok:

33. Press the Magic Wand in the border
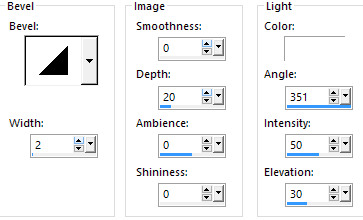
34. Go up to Effects ... 3D Effects ... Inner bevel ... settings like here, press ok:
35. Go up to Selections ... Select None
Rehders-Design
©