

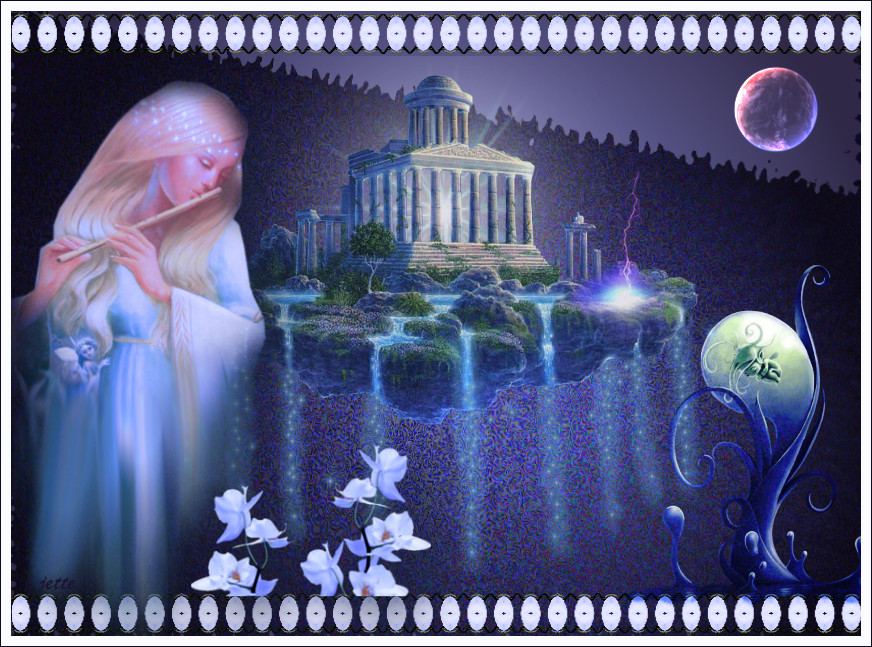
Flutist
Files in the materials like here + a Gradient:

Open the tubes in Paint Shop Pro
The gradient should be in the folder: Documents \ Corel Paint Shop Pro \ 17.0 \ Gradients
The file Concrete in directory: Documents \ Corel Paint Shop Pro \ 17.0 \ Displacement Maps
1. Create a new image 850x625.This image we call your work Image or work Picture
2. Go to the color palette and Gradients ... find gradient: Unicorn2-jette ... set the settings like here, and press ok:
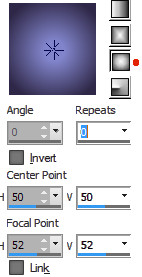
3. Fill your image with the gradient
4. Go to the layer palette ... right click... Duplicate
5. Go up to Effects ... Artistic Effects ... Halftone ... set the settings like here
press first in Grey scale and so in RGB and press ok
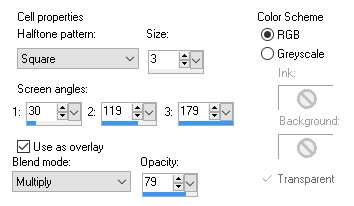
6. Go up to Effects ... Geometric Effects ... Perspective Horizontal ... settings like here, and press ok:

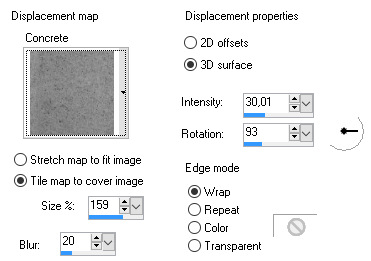
7. Go up to Effects ... Distortion Effects ... Displacement Map ... press the small black triangle in the gray image.
Find Concrete and set the settings like here, and press ok
8. If your image is not fully open so press the square in the bar just above the picture.
If you do not have the square it is because it is already open.

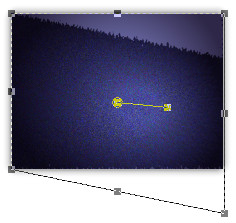
9. Take Pick Tool ... Hold down the shift key on your tastetur while you grasp the square in the lower right corner.
Drag the square below the picture so much that you can not see the gradient of the second layer.
Se på printscreen her under. See the print screen below.
10. Open the tube with borden ... Right in the bar at the top of the tube ... press Copy in what appears
11. Go over your working image ... Right in the bar at the top ... press Paste as new layer
12. Move the tube up to the top edge as my finish image
13. Go to Layer Palette ... right click ... Duplicate
14. Go up in Image ... Mirror ... Mirror Verticalt (in older psp it: Image Flip)
15. Open the tube Celestial temple_dédé ... Right click in the bar at the top, of the tube ... press Copy in what appears
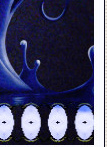
16. Go to your work image ... Right click in the bar at the top ... press Paste as new layer
Move it up like my picture
17. Go to Layer Palette ... set the layer Opacity: 85
18. Go to Layer Palette ... right click ... Merge Visible
19. Put the tube Dyveke-Waterfairy on the picture ... the same way as in 15 and 16
It is important that it comes over the edge of the right side, look at my image,

20. Go to Layer Palette ... set layer Blend Mode: Hard Light
21. Put the lady in the same way as in 15 and 16
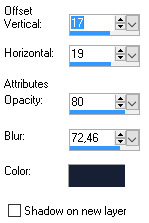
22. Go to Effects ... 3D Effects ... Drop Shadows ... set the color to this color: # 171f35
Settings like here... black color and press ok :
23. Put the flowers in the picture, in the same way as 15 and 16
24. Go to Drop Shadows ... same settings as before
25. Move the tubes in place if they are not already
26. Put the moon in the upper right corner
27. Go to Layer Palette ... set layer Blend Mode: Dodge
28. Put your name on the picture
29. Go up to Image ... Add Borders ... white color ... set numbers to 8 ... check in symmetric
30. Go up in Image ... Add Borders ... use a dark blue color from the image ... set numbers to 1
Rehders-Design
©
