

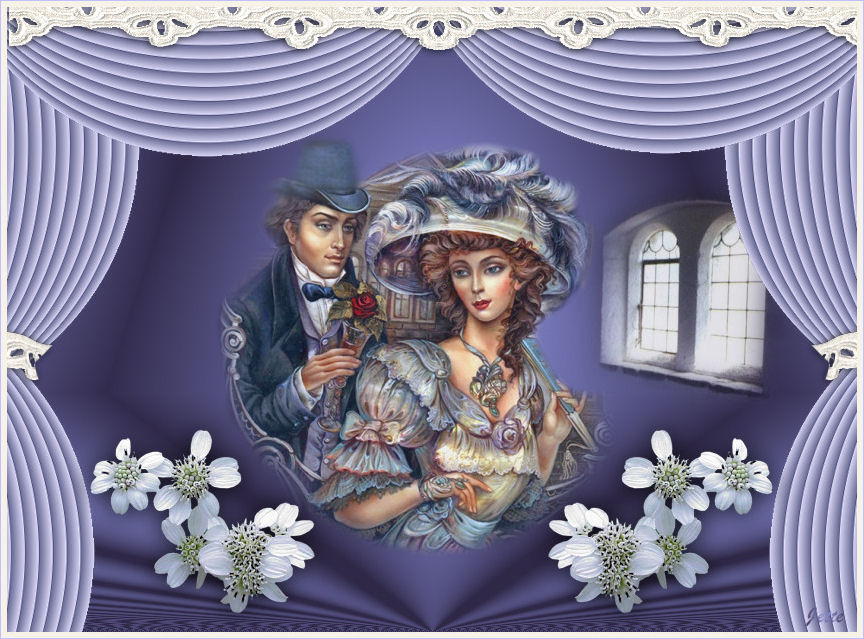
Courtship
The material can be downloaded here: 
These files below are the material + a Gradient

Tuberne åbnes i Paint Shop Pro Open the tubes in Paint Shop Pro
The gradient should be in the folder: Documents \ Corel Paint Shop Pro \ 17.0 \ Gradients
The gradient should be in the folder: My PSP Files \ Gradients
1. Create a new image 850x625. This image we call your working image
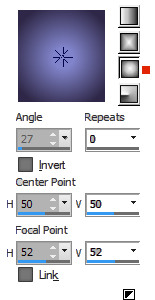
2. Go to the color palette ... Gradients ... find gradient: Unicorn2-jette ... settings like here
and press ok
3. Fill your image with the gradient
4. Go to Effects ... Geometric Effect ... Pentagon ... settings like here, and press ok
5. Go up in Image ... Flip ... Flip Vertical (in older PSP Image ... flip)
6. Create a new layer
7. Fill the layer with this color: # d5d3f3
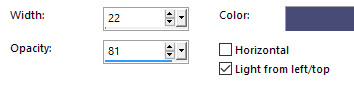
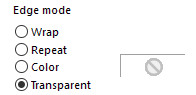
8. Go up to Effects ... Texture Effects ... Blinds ... set this color: # 494b77 and settings like here,
and press ok
9. Go up to Effects ... Geometric Effects ... circle ... settings like here and press ok:
10. Go up to Image ... Resize 735 x 540 pixel ... check in the advanced settings ... no check in resize all layers
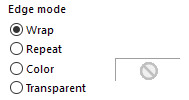
11. Choose Selections Tool ... Rectangel ... set of options as below

12. Make a selection on the right half of the ball
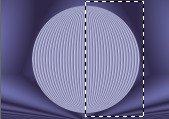
13. Press delete on the keyboard
14. Go up to Selections ... Select None
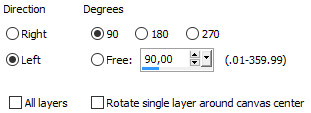
15. Go to Layer Palette ... right click ... Duplicate ...
16. Go up to Image ... Free Rotate ... settings like here, and press ok:
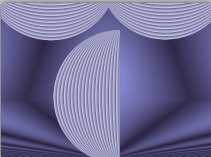
17. Go to Layer Palette ... Duplicate this layer ... move the 2 "curtains" up and out over the edges, as
you see here:
18. Go again to the Layer Palette ... Press on the layer with the vertical half circle
19. Take Move Tool and move it up and over the edge on the right side of your image
20. Go to Layer Palette ... right click ... Duplicate
21. Go up to Image ... Mirror ... Mirror Horizontal :

22. Go to Layer Palette ... Duplicate
23. Choose Move Tool and pull it down and out over the edges on the left and at the bottom, like here:

24. Go to Layer Palette ... right ... Duplicate
25. Gå op i Image ... Mirror ... Mirror Horizontal 25. Go up in Image ... Mirror ... Mirror Horizontal
26. Gå til Layerpaletten ... Luk underste lag på øjet 26. Go to Layer Palette ... Close bottom layer of the eye
27. Gå til Layerpaletten ... højreklik ... Merge Visible 27. Go to Layer Palette ... right click ... Merge Visible
28 Open bottom layer in the Layer Palette ... press on the layer
29. Open the tube with the window ... Right click in the bar at the top of the tube ... press Copy in what appears
30. Go to working image ... Right in the bar at the top ... press Paste as new layer
Move it into place on the right side
31. Go to the layer palette ... Set the layer: Opacity 80
32. Open the tube with the flowers ... Right click in the bar at the top of the tube ... press Copy in what appears
33. Go to working image ... Right click in the bar at the top ... press Paste as new layer
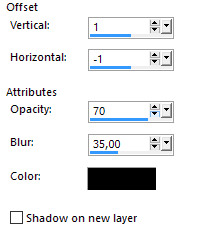
34. Go up to Effects ... 3D Effects ... Drop Shadows ... set the color to black
Settings like here and press ok :
35. Move the flowers in place on the left side as my picture
36. Go to Layer Palette ... right click... Duplicate
37. Gå op i Image ... Mirror ... Mirror Horizontal 37. Go up in Image ... Mirror ... Mirror Horizontal
38. Open the tube with the pair ... the same way as 29 - 30 ... move it into place
39. Stand on the layer with the curtains
40. Open the tube 1 lace ... in the same way as before, and move it into position at the top
41. Go up to Effects ... 3D Effects ... Drop Shadows ... change Blur to 12 ... press ok
42. Open the tube lace 2 in the same way as before, and move it in place to the left
Look at my finished image.
43. Go up to Effects ... 3D Effects ... Drop Shadows ... Settings are from before ... press ok
44. Go to Layer Palette ... right click ... Duplicate
, ,
45. Go to Image ... Mirror ... Mirror Horizontal
46. Put your name on the picture
47. Go up in Image ... Add Borders ... check in Symmetric ... set numbers to 3 ... white color
48. Go again to Add Borders ... set numbers to 1 ... use a purple color from the Image
Rehder-Design
©