
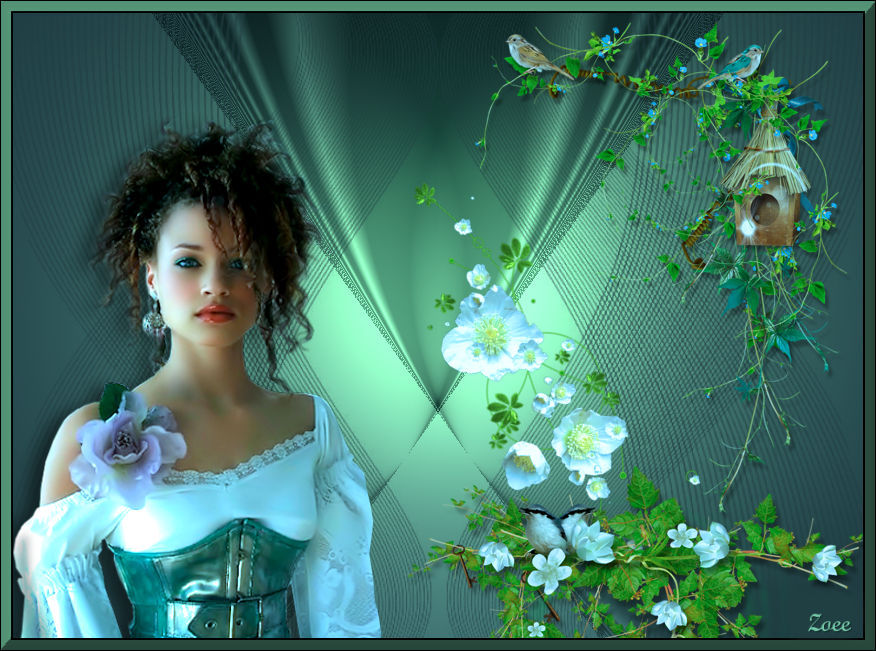
Green light
Tutorial to the older PSP can be downloaded: here
The material can be downloaded here:  Be aware that if in using an older PSP so
Be aware that if in using an older PSP so it is not these files you need, but those who are in the tutorial for psp 10
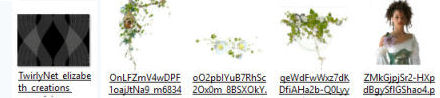
These files below are the material + a gradient and 2 Presets:
Open the tubes in Paint Shop Pro
The gradient should be in the folder: Documents \ Corel Paint Shop Pro \ 17.0 \ Gradients
The mask should be in the folder: Documents \ Corel Paint Shop Pro \ 17.0 \ Masks
Presets must enter the folder: Documents \ Corel Paint Shop Pro \ 17.0 \ Presets
1. Create a new image 850x625 pixels
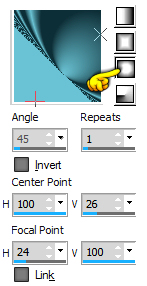
2. Go to the color palette ... Gradients
Find gradient: Rehder_Butterfly ... set of options as below and press ok:
3. Choose Flood Fill Tool ... fill your image with the gradient
4. Go to the Layer Palette ... right click... Duplicate
5. Go to Image ... Mirror ... Mirror Horizontal
6. Go to Layer Palette ... set the layer Opacity 50
7. In the Layer Palette ... right click ... Merge Visible
8. Go to Effects ... Illumination Effects ... Light ... Find Presets: Rehder 25 and press ok

9. Create New Layer
10. Choose the Flood Fill Tool ... fill with this color: #213d43
11. Go up to Layers ... Load / Save Mask ... Load Mask from disk
Find the mask TwirlyNet_elizabeth_creations_Mask ... set of options as below and press Load
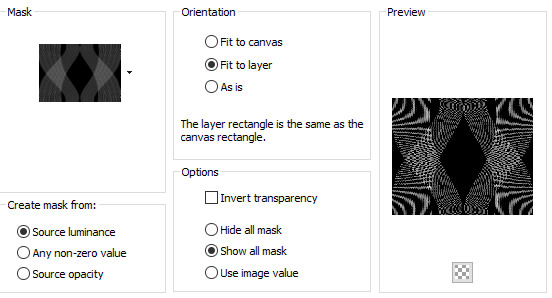
12. Go to Layer Palette ... right-click the mask layer ... Merge all (Flatten)
13. Open the tube: the lady ... right click in the bar at the top of the tube ... press Copy in what appears
14. Go to your working image ... Right click in the bar at the top ... press Paste as new layer
15. Go up to Adjust ... White Balance (in older psp called the Color Balance)
Find Presets: Rehder25 ... press ok
16. Go to Adjust ... Brightness and Contrast ... Brightness / Contrast ... settings like
here, and press ok :

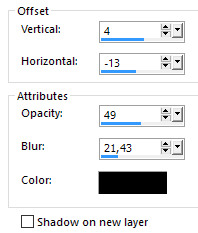
17. Go to Effects ... 3D Effects ... Drop Shadows ... set the color to black
Set settings like here and press ok:
18. Open the tube: OnLFZmV4wDPF1oajJtNa9_m6834 ... Right click in the bar at the top of the tube ...
press Copy in what appears
19. Go to your working image ... Right click in the bar at the top ... press Paste as new layer
20. Go up to Adjust ... White Balance ... Find Presets: Rehder25 and press ok
21. Go up to Image ... Mirror ... Mirror Horizontal ... set the tube into the right corner
22. Put the tube oO2pbIYuB7RhSc2Ox0m_8BSXOkY your image in the same way as in number 18 - 19
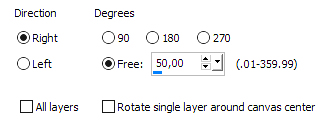
23. Go up in Image ... Free Rotate ... settings like here, and press ok:
24. Go up to Adjust ... White Balance ... Find Presets: Rehder25 and press ok
25. Go up to Effects ... 3D Effects ... Drop Shadows ... Settings are from before ... press ok:
26. Open the tube: qeWdFwWxz7dKDfiAHa2b-Q0Lyyk ... as in number 18 - 19
27. Go to Adjust ... White Balance ... Find Presets: Rehder25 and press ok
28. Move the tubes at the place if they are not
29. Put your name on the picture
30. Add Borders ... check in symmetric ... set to 2 ... black color ... press ok
31. Add Borders ... set to 10 ... color: #63ae90 ... press ok
32. Choose Magic Wand and press in the border
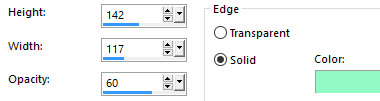
33. Go to Effects ... 3D Effects ... Buttonize ... set of options as below:
farve: #91f9c4 color: #91f9c4
34. Go up to Selections ... Select None
35. Add Borders ... set of numbers to 1 ... black color
Rehder-Design
©