Marionettes
The material is available here: 
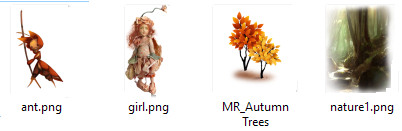
These files below are in the material:
Tuberne opens in Paint Shop Pro
1. Create a new image 850x625
2. Set this color to the foreground color: # dd3b03 and this in the background color: # c00000
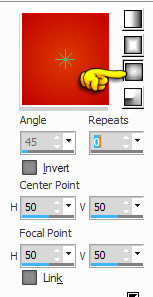
3. Go to Gradients ... find the gradient: foreground-background
Set the settings below and press ok:
Since Psp has a reversed gradient, notice that the brightest point should be in the middle
If you do not , then you have to tick in Invert.
4. Take Flood Fill and Fill the image with the gradient
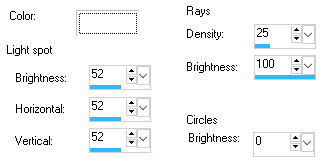
5.Get up in Effects ... Illumination Effects sunburst ... set the options below and press ok:
White color
6. Go to Effects ... Image Effects ... Seamless Tiling ... set the options below and press ok:
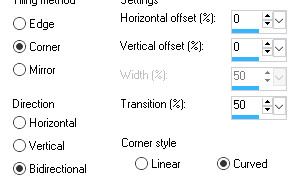
7. Go to Effects ... Distortion Effects ... Ripple ... Set the settings below and press ok
Color: # FFCF3d

8. Open the tube Nature1 ... Right-click in the bar on top of the tube ... press Copy in what appears
9. Switch to your work picture ... Right-click in the bar above ... press Paste as new layer
Put it in place on the right side of the image
10. Go to the Layer Palette ... do not forget this : set Blend Mode to Hardlight
To do this, touch the little black triangle ... and in what appears: press Hardlight
11. In the Layer palette: right-click ... duplicate
12. Go up in Image ... Mirror ... Mirror Horizontal (in older Psp: Image ... Mirror)
13. Go to the Layers palette: right click ... Merge Visible
14. Open the tube with the girl ... Right click on the bar on top of the tube ... Edit Copy
15. Switch to your work picture ... Right-click in the bar above ... press Paste as new layer
Put the girl in place as in my picture
16. Open the tube with the trees ... Copy / Paste in the same way as in points 14 and 15.
Put the trees in place on the left side as in my picture
17. Open the tube Ant ... Copy / Paste in the same way as in points 14 and 15.
Put the tube in place at the bottom of the right side as in my picture
18. Go to the Layer Palette ... Close the bottom layer of the eye
19. In the Layers palette ... right-click on a tube layer ... Merge Visible
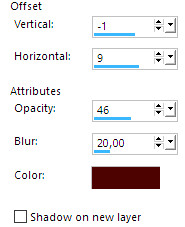
20. Go to Effects ... 3D Effects ... Drop Shadows ... Set the settings below and press ok
Color # 4b0600
21. Go to layer palette ... open bottom layer again, same place as you closed it
22. Put your name on the image
23. Go up in Image ... Add Borders ... color: # 2a1600 ... set speech to 2 ... notch in symmetric
24. Go up to Image ... Add Borders 20 ... Color: #f7d64d
25. Take Magic Wand ... set options as below:

26. Press in the yellow table
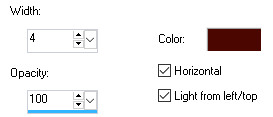
27. Go to Effects ... Texture Effects ... Blinds ... Set settings as below and press ok:
Color # 4b0600
28. Go back to Blinds ... clear the checker by horizontal and press ok
29. Go to Selections ... Select None
Rehder-Design
©